Using Quizizz in the Classroom

Quizizz is an app and website that is quite similar to Kahoot with a few interesting additions. Like Kahoot, a user can create a series of questions to ask a group of people who compete to answer them correctly and speedily. Scores are determined according to whoever answers correctly first.

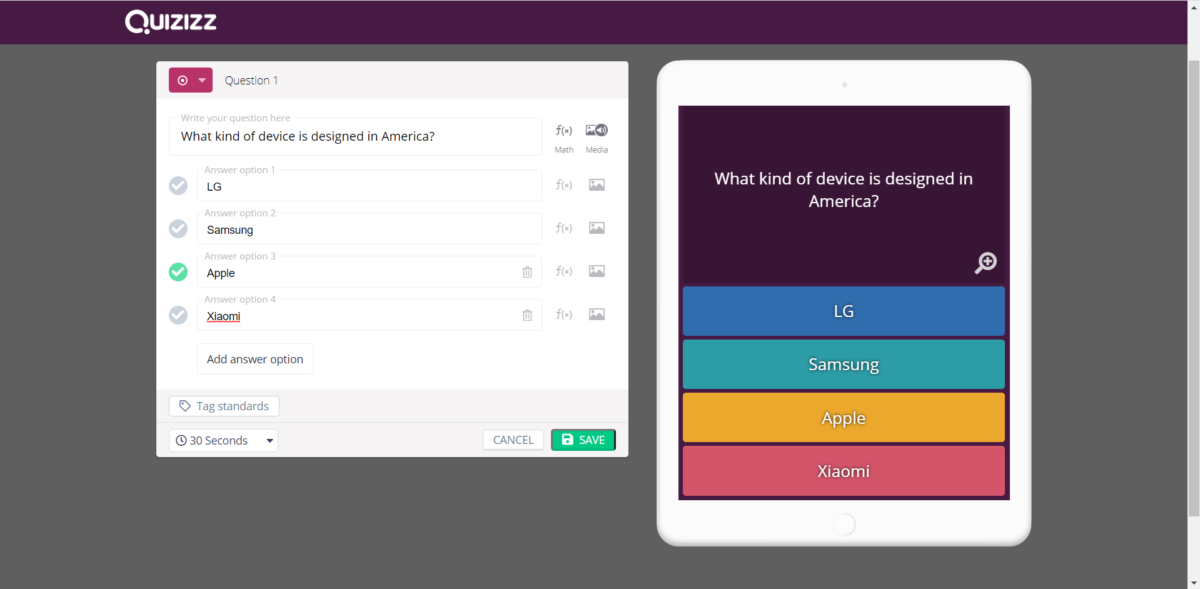
Quizizz, unlike Kahoot, adds some additional features to the game itself including different Theme choices and Power-ups. And in Quiz creation, whereas Kahoot only has two “free” question types (multi-choice and true/false), Quizizz has a total of FIVE possible options:

  1. Multiple choice (one correct answer)
  2. Checkboxes (more than one correct answer)
  3. Fill in the blank (correct answers + alternatives)
  4. Open-ended (no correct answers, opinion based)
  5. Poll (multiple choice – or checkboxes – opinion based)

Quizizz also adds the option of connecting to Google Classroom to assign quizzes for homework to your classes.

Uses for the Classroom

  • Surveys (interest, voting, etc)
  • Competitive Quizzes / Games
  • Informal skills / knowledge tests & assessments (Reports)
  • Assign as Homework (Google Classroom connection)

Recommendation: As with Kahoot, Quizizz also has an app where it is possible to create and edit quizzes. However, I it is still slightly easier to find everything on the website (the screen is larger), and you will likely be hosting your quizzes from the computer. So it is a good idea to familiarize yourself with the website first.

Step 1: Sign up / in

  1. Go to quizizz.com and click “Sign up”
  2. Sign up with your Google account (or email)***
  3. Select your role (Teacher)
  4. Select how you are using it (At a School)
  5. Welcome to the Dashboard

*** Important note about “Sign up”

In the Sign Up screen, you have TWO options:

  1. Sign up with Google
  2. Sign up with email

Whichever option you choose to sign up with MUST be used to sign in later (and they do not overlap each other). For example:

  • if you sign up with Google, you CANNOT use Email / Password to sign in later
  • if you sign up with Google, you MUST use Google to sign in later

Why “Google” and “Email / password” are not the same

The reason for this is because of the authentication (sign in) method used by the website.

  1. Google Sign In log you in with an authentication TOKEN
    • (A separate window opens where you log in to your Google account separately. Once you authenticate (login) with Google, your email service sends a unique authentication TOKEN to Quizizz in order to confirm your identity. So, in this case, Quizizz does NOT store your password at all, but rather relies on the TOKEN provided by Google to log you in.)
  2. Email / password will remember both your email AND your password
    • (The password is actually passed through a hashing algorithm in order to scramble it so it can’t be intercepted by another user. The scrambled password is matched with the scrambled password stored in the database for your user ID, and if the two scrambled passwords match, your identity is confirmed and you are logged in. So, in this case, Quizizz stores BOTH your email AND scrambled password in their database.)

That is why the two sign in methods are not compatible (interchangeable).

  1. Email / password = uses your email / password (and remembers both)
  2. Google = uses a TOKEN (and remembers only your email)

Step 2: Search for / Create a Quiz

  1. “Search” for quizzes to use
    1. You’ll be shown a list of relevant search results
    2. Select one to view (you can also Like or Save them to a Collection). From here you can Play Live, Assign HW, or Practice
  2. “Create” a new Quizizz of your own
    1. Write your own question at first to familiarize yourself with the Question Types
    2. There are FIVE Question Types shown above:
      1. Multiple choice (one correct answer)
      2. Checkboxes (more than one correct answer)
      3. Fill in the blank (correct answers + alternatives)
      4. Open-ended (no correct answers, opinion based)
      5. Poll (multiple choice – or checkboxes – opinion based)
    3. After you finish creating questions, you’ll still be able to Edit them
    4. Click “Done” in the upper-right to finish the Quiz (you must choose a grade level, and can also add additional details)
    5. The Quiz will then appear in “My Library”
    6. If you click on your finished Quiz, you can Play, Assign HW, or click “Edit” in the Quiz details box to edit it further

Step 3: Play / Assign a Quiz

To Play or Assign a Quiz as Homework, first select the Quiz you want either from Search or from “My Library.”

  1. From Single Quiz View
    1. Assign HW – brings up options for date, time, and class (linked to Google Classroom)
    2. Play – gives a few options like Team, Classic, and Test (choose Classic)
  2. The Teacher’s View shows the Quiz ID students need to enter to join the quiz
  3. Students navigation their Internet browsers to joinmyquiz.com and enter the ID
    1. Students may choose a Nickname (and other options)
    2. Then, select a Theme
  4. From the Teacher’s View, once the students have all joined, they may now “Start” the Quiz
  5. Students are show a question
    1. And may click their answer – they are awarded points and bonuses depending on their answers and time elapsed
  6. Teachers can watch student progress through the quiz
    1. And at the end of the quiz, they are shown a report with statistics from the quiz results
  7. Students also can review their own performance after the quiz

Step 4: Quiz Reports + Google Classroom

As mentioned above, at the end of a quiz:

  1. Teachers can immediately view the quiz results
  2. Students also have their own quiz results review page
  3. Additional Reports can be found in the “Reports” link in the left sidebar
    1. A single report view shows the full list of students who took the quiz as well as all their answers, and statistics about the quiz. It’s well worth investigating.
  4. Finally, Google Classroom can also be linked to Quizizz from the “Classes” link in the left sidebar

I hope that gives you a good overview of using Quizizz in your classrooms. There is much to explore, so just take some time to familiarize yourself with the program. Again:

  1. I recommend getting familiar with the website FIRST
  2. And then going back in to the app to learn it

Once you know what is available in Quizizz through the website, it’ll be a lot easier to find it in the app.

Good luck!~

Using Kahoot in the Classroom

Kahoot is an interesting app and website that allows one user to create a series of questions to ask a group of people who compete to answer them correctly and speedily. Scores are determined according to whoever answers correctly first (points are allocated in decreasing amounts to second place, third place, and so on).

Uses for the Classroom

  • Competitive Quizzes / Games
  • Informal skills / knowledge tests & assessments (Reports)

Recommendation: Although the Kahoot App also makes it possible to create and edit Kahoots, I remember doing MOST tasks on the computer because it is slightly easier to find everything (the screen is larger), and you will likely be hosting your Kahoots from the computer. So it is a good idea to familiarize yourself with the website first.

Step 1: Sign up / in

  1. Visit kahoot.com
  2. Click “Sign up” in the upper-right hand corner
  3. Select your Account type (Teacher)
  4. Select your Workplace (School)
  5. Create account ***
  6. Select your Edition (Free)
  7. Provide additional info (optional)
  8. Explore the Dashboard (Get Started)
    1. See how it works
    2. Create kahoot
    3. Host kahoot

*** Important note about “Create account”

In the Create Account screen, you have THREE options:

  1. Email / password
  2. Sign up with Google
  3. Sign up with Microsoft

Whichever option you choose to sign up with MUST be used to sign in later (and they do not overlap each other). For example:

  • if you sign up with Google, you CANNOT use Email / Password to sign in later
  • if you sign up with Google, you MUST use Google to sign in later

Why “Google” and “Email / password” are not the same

The reason for this is because of the authentication (sign in) method used by the website.

  1. Email / password will remember both your email AND your password
    • (The password is actually passed through a hashing algorithm in order to scramble it so it can’t be intercepted by another user. The scrambled password is matched with the scrambled password stored in the database for your user ID, and if the two scrambled passwords match, your identity is confirmed and you are logged in. So, in this case, Kahoot stores BOTH your email AND scrambled password in their database.)
  2. Google and Microsoft Sign In log you in with an authentication TOKEN
    • (A separate window opens where you log in to your Google or Microsoft account separately. Once you authenticate (login) with Google or Microsoft, your email service sends a unique authentication TOKEN to Kahoot in order to confirm your identity. So, in this case, Kahoot does NOT store your password at all, but rather relies on the TOKEN provided by Google or Microsoft to log you in.)

That is why the two sign in methods are not compatible (interchangeable).

  1. Email / password = uses your email / password (and remembers both)
  2. Google / Microsoft = uses a TOKEN (and remembers only your email)

Step 2: Create / find a Kahoot

You may wish to investigate Kahoots that have already been created first to get an idea for the kinds of things that are possible. Click “Discover” in the top menu to do so. Later, you may wish to “Create” your own (top-left button).

  1. “Discover” Kahoots (top menu button)
    1. Search for a Kahoot that looks interesting
    2. Select it to view the questions
    3. Some Kahoots you may be able to Edit, or add to your own Library. Others you may only be able to Favorite and Play with your class
  2. “Create” your own Kahoot (top-right button)
    1. Create a New Kahoot or use a Template
    2. You can modify an existing Template
    3. Or, if you are creating a New Kahoot, type your own questions and answers
    4. Question Types:
      1. Quiz (4 choices)
      2. True / False (2 choices)
      3. Typing (premium)
      4. Puzzle (premium)
      5. Poll (premium)
      6. Slide (premium)
  3. After creating a Kahoot (or using a Template), find it in your Library of Kahoots under the “Kahoots” button in the top menu

Step 3: Host your Kahoot

To host / play your Kahoot:

  1. View your Kahoots Library
  2. Click “Play” on the Kahoot you want to host
  3. Click “Teach” to play it in class
  4. Select “Classic” in Game options (you may also want to change or disable the Lobby music toward the bottom of the screen)
  5. When you Start the game
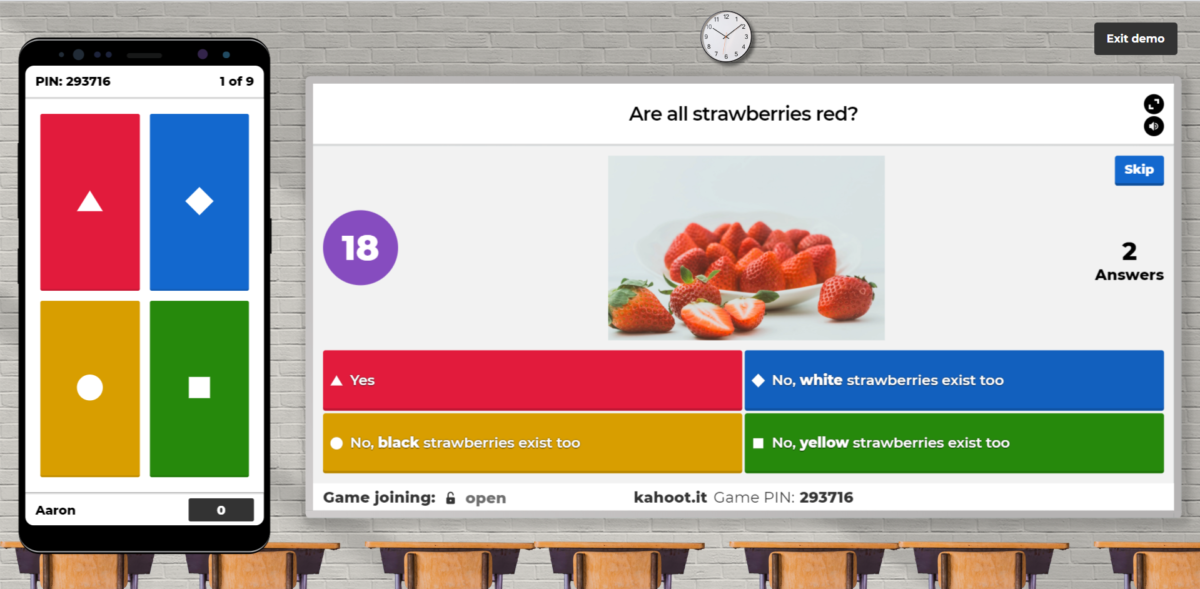
    1. The screen on the right will appear on your projector / computer
    2. Students should go to kahoot.it to enter the Game PIN on their devices
    3. Students can choose a Nickname (caution: some students may try to choose joking or rude nicknames)
    4. Once all students have entered the Game PIN and a nickname, Start the Game
  6. Questions will be shown on screen with a timer
  7. Students select the correct answer from the group of symbols on their device
  8. After all students have answered (or time is up) the correct answer will be shown on screen
  9. Finally, a leaderboard will be shown and tally up each player’s points

Step 4: Kahoot Reports

You will also be able to see a detailed analysis of the results of a played Kahoot in the “Reports” tab.

  1. Click “Reports” in the top menu
  2. Select the Kahoot you want to view reports for
  3. Detailed analysis includes:
    • Correct %
    • Difficult questions
    • Students who need help
    • Students who didn’t finish

I hope that gives you a good overview of using Kahoot in your classrooms. There is much to explore, so just take some time to familiarize yourself with the program.

  1. I recommend getting familiar with the website FIRST
  2. And then going back in to the app to learn it

Once you know what is available in Kahoot through the website, it’ll be a lot easier to find it in the app.

Good luck!~