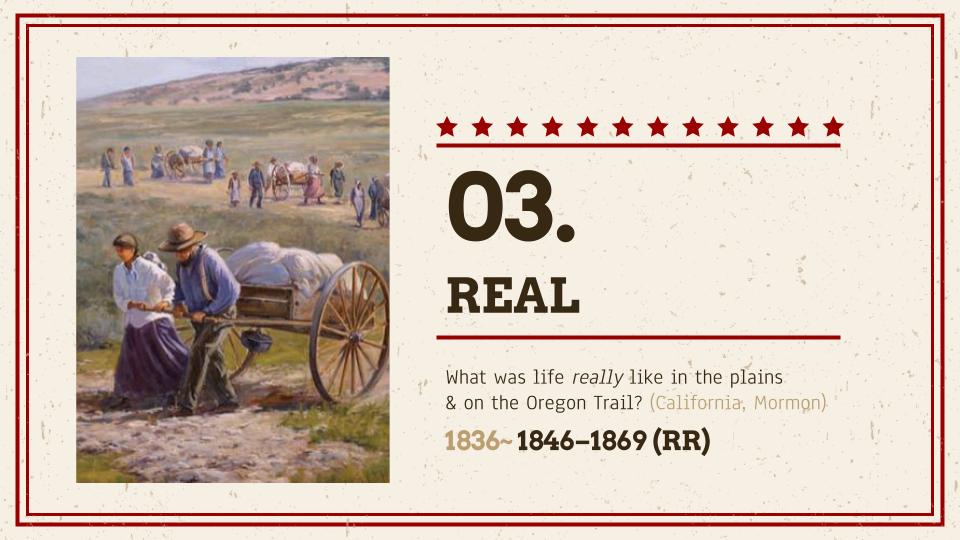
What was life really like in the plains and on the Oregon Trail? This section of the PPT explores some of the real challenges and hardships faced by American pioneers as they journeyed westward. It will use the Oregon Trail game as an example, reference, and model to help better understand the Oregon Trail in a fun and educational way.
The Oregon Trail game is perhaps the most famous educational computer software game ever created. Even today, references to the game can be found throughout popular culture.
The following 18 landmarks were included in the original version of the Oregon Trail game. These are not the only major landmarks on the historic Oregon Trail (notice the infamous Platte River is missing), but they are a good starting point to learn about the realities of life on the trail. Therefore, the same landmarks are included in the Oregon Trail PPT game that’s available at the end of this presentation.
Independence, Missouri (starting point)
Kansas River (102 mi)
Big Blue River (82 mi)
Fort Kearney (118 mi)
Chimney Rock (250 mi)
Fort Laramie (86 mi)
Independence Rock (190)
South Pass (102 mi)
a) Green River (57 mi) (leads to Soda Springs)
b) Fort Bridger (125 mi) (leads to Soda Springs)
Soda Springs (143, 162 mi)
Fort Hall (57 mi)
Snake River (182 mi)
Fort Boise (113 mi)
Blue Mountains (160 mi)
a) Ft. Walla Walla (55 mi) (detour before The Dalles)
The Dalles (125 mi, 120 mi)
Columbia River (5 + 95 mi)
Barlow Road (100 mi)
Willamette Valley, OR!! (final destination)
Independence, Missouri (starting point)
Kansas River (102 mi)
Big Blue River (82 mi)
Fort Kearney (118 mi)
Chimney Rock (250 mi)
Fort Laramie (86 mi)
Independence Rock (190)
South Pass (102 mi)
a) Green River (57 mi) (leads to Soda Springs)
b) Fort Bridger (125 mi) (leads to Soda Springs)
Soda Springs (143, 162 mi)
Fort Hall (57 mi)
Snake River (182 mi)
Fort Boise (113 mi)
Blue Mountains (160 mi)
a) Ft. Walla Walla (55 mi) (detour before The Dalles)
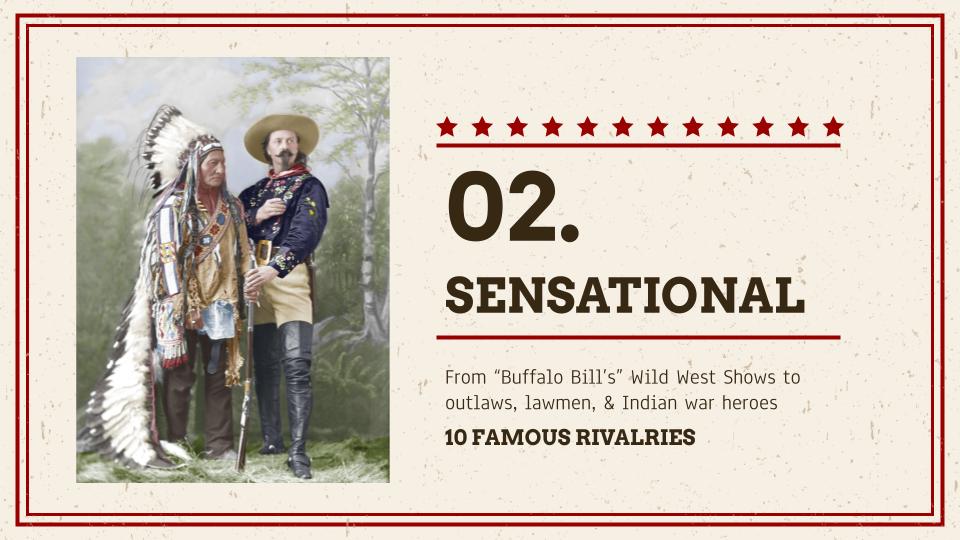
The American Old West is probably most well known for stories of “cowboys vs. Indians” or “outlaws vs. lawmen.” While many stories are true, much of what we think of when we think of the Old West has been sensationalized to the point of legend. This section will include cowboys, Indians, outlaws, and lawmen, but will focus more on the biggest rivalries during that period than on individuals.
This section of the the presentation will cover the following ten Old West rivalries:
Hamilton vs. Burr (1804)
North vs. South (1861-1865)
Cowboys vs. Indians (1883-1913)
US Army vs. Indians (1775-1924)
Man vs. Wild (1836-1869)
Outlaws vs. Lawmen (1865-1890)
Government vs. Big Business (Trust-busting) (1900-1917)
Hatfields vs. McCoys (& other famous feuds) (1863-1891)
Blacks vs. Whites (the title is an obvious over-simplification) (1526-??)
This section of the PPT focuses on the historic Old West. It is broken into three major sections and a total of eight subsections. Each subsection includes between five to eight major events that defined the era. It covers nearly 50 total events.
My goal here is to just give a brief overview of the events, and how one thing led to another. For more details about each event, click the links within to explore Wikipedia or other resources.
The Historic American Old West can be broken down into three major sections:
Hamilton wrote extensively in support of ratification of the U.S. Constitution. He wrote 51 of 85 of The Federalist Papers that argued for ratification.
The U.S. constitution consisted of 7 articles and establishes a strong federal government (which Hamilton was in favor of).
Articles 1-3: Detail the separation of powers of the U.S. government
Articles 4-6: Lay out the rights of state governments
Consisting of 10 Amendments to the Constitution that were written to address objections raised by non-Federalists regarding the powers of the federal government laid out in the Constitution.
James Madison studied the deficiencies pointed out by non-Federalists and crafted articles of amendment that he wanted to be included within the Constitution itself. Congress approved twelve articles, and the States ratified 10 of these, but they were kept separate from the Constitution as the Bill of Rights.
The Jay Treaty resolved ongoing issues between the U.S. and Great Britain after the 1783 Treaty of Paris (which officially ended the Revolutionary War and established boundaries between the U.S. and Great Britain in North America).
The Jay Treaty is named for John Jay, who was the main negotiator, although is was designed by Hamilton and supported by Washington. It facilitated 10 years of peaceful trade between the two in the midst of the French Revolutionary Wars that began in 1792.
The Treaty angered France and bitterly divided the U.S. into two parties: the pro-British, pro-Treaty Federalists (Hamilton) vs. the pro-France, anti-Treaty Jeffersonian Republicans (Jefferson).
France, angered by the Jay Treaty, and the U.S. declaration of neutrality from the war in Europe (1792), stepped up efforts to disrupt trade with Britain. In 1797, an American diplomatic commission was sent to France to try to negotiate a solution to these problems that might lead to war.
The diplomats were approached through informal channels by French diplomats Jean-Conrad Hottinguer, Pierre Bellamy, and Lucian Hauteval (later referred to as diplomats “X”, “Y”, and “Z” in documents released by the Adams administration) who demanded bribes and a loan for French foreign minister Talleyrand before negotiations would begin.
The affair outraged the U.S. and led directly to the undeclared Quasi-War. Federalists were in control of both houses of Congress and the presidency, and took advantage of the outrage to build up the nation’s military. They also attacked the Jeffersonian Republicans for their continued pro-French stance.
Jeffersonians are more Frenchman than American.
Hamilton
Jefferson would counter that Federalists are more British, and focused on building a monarchy, than a true democratic republic (i.e. they are more anti-American than we are).
In 1793, Congress had suspended repayments of French loans incurred during the Revolutionary War. This, along with the Jay Treaty that France viewed as contrary to their own treaties with the U.S. led France to begin capturing American ships at sea that were trading with Britain.
By October 1797, over 316 American ships had been captured. And when diplomatic negotiations failed due to the XYZ Affair, Federalists used it as an opportunity to build up the American navy for a war against France.
After ratifying the U.S. Constitution, the Federalist-dominated Congress (Hamilton’s party) passed a series of 4 Acts, known as the Alien & Sedition Acts. The Federalists argued these would strengthen national security during the Quasi-War with France. Critics argued they were an attempt to suppress non-Federalist votes and violated the freedom of speech in the First Amendment of the Constitution.
Naturalization Act: harder for an immigrant to become a citizen
Alien Friends Act: allowed the President to imprison and deport non-citizens who were considered dangerous
Alien Enemies Act: imprison and deport non-citizens from a hostile nation (such as France)
Sedition Act: criminalized making “false statements” critical to the national government
Actually, before the Louisiana Purchase of 1803, America faced a constitutional crisis and nearly a revolution (thus, this election is sometimes referred to as the “Revolution of 1800”). For a full explanation, this post on Vox contains some great detail.
Long story short, at that time, in presidential elections, the first place person would become President and the second place person would be Vice President. But no one had considered what would happen when one party put forth BOTH a Presidential choice and a Vice Presidential choice at the same time.
The Republicans had put forth Thomas Jefferson as Presidential candidate and Aaron Burr as Vice Presidential candidate. But, they both received 73 votes which meant “technically” there was a tie between them.
The opportunistic Burr realized that the Federalists feared Jefferson and might actually hand him the presidency in a tie-breaker. But Hamilton managed to eventually sway Federalist opinion away from Burr. So even though he had fiercely opposed Jefferson previously, now he helped him get elected to President (since his own Federalist party lost the election). But this is not the event that led to their duel.
In 1804, he was dropped from the Presidential ticket with Jefferson because of his behavior in 1800 (and actually, he was frozen out of any influence in the 1800 Jeffersonian administration as well). He then attempted to revive his political career by (unsuccessfully) becoming governor of New York. Burr heard reports that Hamilton had privately slandered him before the election, and that was the last straw. The duel was on. This whole story sure gives a new level of depth to their rivalry.
I feel it is a religious duty to oppose his career.
Hamilton
I would have shot him in the heart if my vision had not been impaired by the morning mist.
Burr
And yet, that is not the end of Burr’s story. He later attempted to treasonously claim and take over parts of America (as President of his own America) that he apparently thought the federal government had less control and power over.
He claimed to have been attempting to increase the size of Jefferson’s U.S. by taking the land from Spain. But Jefferson had him arrested and tried for treason. He was found not guilty by the judge in a controversial decision, but here now is another reason he’s considered a villain in U.S. history.
The Louisiana Purchase was a long-term goal of Thomas Jefferson who was able to complete the deal with France in 1803. France had controlled the Louisiana Territory since 1699, ceded it to Spain in 1762, and then regained ownership of it in 1800 through Napoleon.
The U.S. purchased the territory for $15 million, and the acquisition nearly doubled the size of the existing U.S. territory by adding to it approximately 828,000 square miles (2.14 million sq. km) of new land.
However, boundaries were not determined exactly, until:
The Treaty of 1818 with Britain that firmly established the northern boundaries, and
The 1819 Florida Treaty with Spain that firmly established the western boundaries
Shortly after the acquisition of the Louisiana Territory, Army Captain Meriwether Lewis and Second Lieutenant William Clark formed the Corps of Discovery, a select group of U.S. Army and civilian volunteers, commissioned by President Thomas Jefferson, to explore and map the new territory.
They set out from Camp Dubois in Illinois in May 1804 and spent the next two years in exploration. In the winter of 1804, they built Fort Mandan in North Dakota. In April, when they were about to set out again, tensions rose among the native Mandan people and nearly came to a conflict. It was then that the party met a French-Canadian fur trapper and his Shoshone wife, Sacagawea.
From there, the two stayed with the expedition, serving as guides, cook, and interpreter until nearly the end (August 1806). Sacagawea proved invaluable to the expedition and is remembered widely as perhaps the most important key to its success. Her husband, the trapper, was not remembered so fondly, and Lewis has called him “a man of no particular merit” as well as “perhaps the most timid waterman in the world.”
By the time the expedition returned to St. Louis in September 1806, they had explored over 6,000 miles of new territory, produced 140 maps, encountered 70 Indian tribes, and discovered 200 new species.
The AFC was founded in 1808 by German immigrant John Jacob Astor, and by 1830, his company (in multiple locations) had grown to monopolize the fur trade in the U.S., becoming one of the largest and wealthiest businesses at that time.
In 1811, his company established Fort Astoria in Oregon at the mouth of the Columbia River. It was the first American settlement on the Pacific coast. In June, most of the crew of the Tonquin, one of his trading ships , was massacred by the Tla-o-qui-aht Indians after the captain insulted a chief.
The following October, 1812, a group of his company discovered South Pass, WY (see below) as a viable passage across the Continental Divide, when they returned east to tell of the fate of the Tonquin.
In September 1808, peninsular-born Spaniards in New Spain (Mexico) overthrew the Viceroy. In 1810, American-born Spaniards began plotting an uprising against Spanish rule, and on September 16, the Catholic priest of the village of Dolores rang his church bell, giving the call to arms for the beginning of the revolution.
By 1821, the war for independence concluded with the Treaty of Cordoba. Also in 1821, Spain’s Florida Treaty with America took effect – two years after its initial signing. Both events weakened Spain’s hold on lands in North America and paved the way for further American influence and expansion.
South Pass was discovered in October 1812 by a group of 7 men from the Pacific Fur Company (a subsidiary of John Jacob Astor’s American Fur company (see above)). They were returning to tell of the massacre of the crew of one of their trading ships.
South Pass would later by used by more than half a million westward migrants as part of the main route of the Oregon Trail, among others. It was the key, primary passageway for wagons bound for the Pacific, and its discovery proved invaluable for America’s early westward expansion.
The War of 1812 was the only war in U.S. history in which the U.S. Capitol was burned, and the only war fought between the U.S. and Canada.
In fact, at that time, northeastern Canada was under British rule. Canada did not become a truly independent nation until 1982, when it adopted its own constitution, although they are still a part of the British Commonwealth – which accepts the British monarch as its own.
The war, therefore, was another conflict between Britain and the U.S., this time stemming from different things:
Long-standing territorial disputes
Britain supported Native American tribes who opposed U.S. colonial settlement in the Northwest Territory (surrounding the Great Lakes)
In 1807, the Royal Navy began enforcing tighter restrictions on U.S. trade with France
Britain began impressment of men (forced conscription into their military) on captured U.S. ships – even if they had a document of U.S. citizenship
The conflict primarily arose at sea, and could have been fought primarily at sea (many battles were), but the Royal Navy was far larger and stronger. Therefore, the U.S. decided to invade Canada – to attack Britain on land, where they might have an advantage – and expand U.S. territory into northeastern Canada.
Until 1814, Britain was partially also involved in a war with Napoleon in Europe, so they were less able to put their full might behind defending Canada. But by 1814, the conflict with Napoleon was resolved, and they were able to reinforce their troops in Canada.
The Treaty of Ghent was signed between the two countries in the city of Ghent, United Netherlands on Christmas Eve, 1814, but would not take effect until 1815.
In fact, one of the biggest battles of the War of 1812 was fought in New Orleans after the Treaty was signed. The Battle of New Orleans was the climax of Britain’s five-month Gulf Campaign to capture New Orleans, and possibly the rest of the Louisiana Territory. But under the leadership of Brevet Major General Andrew Jackson, the greatly outnumbered American forces defeated the British assault in just over 30 minutes. The Americans suffered 71 casualties, while the British suffered over 2,000, including the deaths of their first and second-in-command.
The victory was deemed the “Miracle at New Orleans” and made Andrew Jackson a household name and popular culture (pamphlets, songs, editorials, speeches, and plays) glorified his image to heroic and legendary. His popularity led to his election as the 7th President of the U.S. in 1828.
Era of “Good Feelings” (1817-1825)
Five key events during the Era of Good Feelings:
Florida Treaty with Spain
2nd Great Awakening
Missouri Compromise
Mexican Independence Achieved
“Monroe Doctrine”
The phrase “Era of Good Feelings” was first used by Benjamin Russell in the Columbian Centinel, a Federalist newspaper based in Boston, on July 12, 1817. It followed President James Monroe’s visit to Boston as a part of his good-will tour of the U.S.
The period is marked by downplayed partisan affiliations (particularly on the part of President Monroe), the collapse of the Federalist party, and a collective sense of national pride and purpose – with a desire for national unity – following the War of 1812.
After nearly two weeks of 6-8 hour days, scouring Wikipedia and other historical websites and blogs, I feel like I’ve retaken my high school American History class, but this time with greater insights into what happened during that period of time.
I was asked to give a presentation on “American Pioneers” for the Teacher Training program I’m involved with. I said, “great, I’m related to some of the Old West pioneers – I could probably talk about that a little.”
But as I got to work building the PPT, I realized there was actually a LOT of stuff that I was only marginally familiar with. And as I dug deeper, I became enthralled with my study of the American Old West – it’s quite fascinating.
Breakdown
This presentation is LONG (200+ slides in total). Although that’s partially due to splitting US map gifs depicting the growth of the nation into multiple slides, I think the full PPT and contents contained within are of such a length as to warrant multiple blog posts. Therefore, the full presentation will be broken down in this way:
Continue reading below for a description of each concurrent section.
Brief introduction
This presentation begins almost where my Hamilton presentation ends. (But it includes some important events that took place during the Federalist Era while Hamilton was still alive, such as the U.S. Constitution and Bill of Rights.)
Hamilton was shot and killed in 1804 in a duel with then Vice President Aaron Burr. The Louisiana Purchase was made in 1803, which began the period of westward expansion in the US.
Historical Old West
The period of the American Old West can be broken down into three major sections:
The American Old West is probably most well known for stories of “cowboys vs. Indians” or “outlaws vs. lawmen.” While many stories are true, much of what we think of when we think of the Old West has been sensationalized to the point of legend.
This section will include cowboys, Indians, outlaws, and lawmen, but will focus more on the biggest rivalries during that period than on individuals. I’ve selected the following ten rivalries to focus on:
The Oregon Trail is probably the best known example of American westward expansion and “manifest destiny.” It was largely popularized for a generation of students in the 1970s and 80s on the Apple II computer, and other devices, in the form of a computer game developed by MECC.
The Oregon Trail game is a classic (I grew up with it as well), and arguably the top educational game of all time. It introduced players to the harsh realities of the Oregon Trail in a fun and educational way. Therefore, this section of the PPT partially attempts to recreate the experience of the computer game as a PPT game that can be played in a classroom. It is divided into two sections:
The Teacher Training program I’m involved with usually goes abroad during the school vacation periods for additional training and cultural experiences in a Western country (USA, Canada, England, Australia, etc). However, since 2020, due to the Covid-19 pandemic, travel abroad has been canceled.
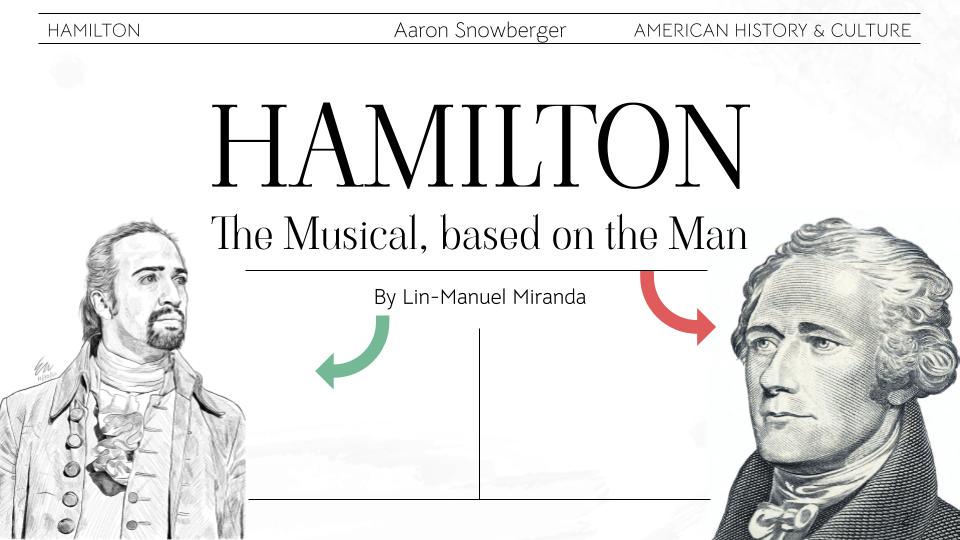
Therefore, I was asked to present on American history or culture in order to provide a small taste of the experience they will miss by not going abroad this session. So, I selected Hamilton: The Musical because it tells the story of the American Revolution up to the founding of the US government through the eyes of one of its key members, the first Secretary of the Treasury, and the man on the $10 bill: Alexander Hamilton.
Additionally, Disney+ released the full Broadway musical as a movie in July 2020 during the pandemic, just before the first time I gave this presentation. The timing was perfect.
Introduction
Why did I choose to introduce you to this particular musical?
I was asked to present on American History & Culture
This story tells of the foundation of the United States of America and its government – from the American Revolution against Britain to the establishment of the US government and the third US President (Jefferson)
Alexander Hamilton was a US Founding Father
1 of 7 key figures (John Adams, Benjamin Franklin, Alexander Hamilton, John Jay, Thomas Jefferson, James Madison, & George Washington)
He wrote majority of The Federalist Papers (51 of 85), that argued for ratification of the Constitution
Hamilton is one of very few key figures to appear on US currency. His face is on the $10 bill
It is one of the most popular & decorated (award-winning) musicals of all time (with 16 Tony nominations, 11 wins, and a Pulitzer Prize for Drama)
It is musically, lyrically, a work of art – choreographed beautifully, with so many small details, hidden meanings, and foreshadowing, it would be a shame NOT to learn about it
It was released as a full-length movie on Disney+ in July 2020, just in time for the first time I gave this presentation during the Covid-19 pandemic
Reviews of the Musical
“2015’s best rap album isn’t by Drake, Kendrick Lamar or Dr. Dre — it’s the cast recording of Hamilton, a vital companion to the most creative, most talked-about musical to hit Broadway this millennium.”
Let’s start with getting to know the three most important people who made this musical / movie possible.
Rob Chernow
Rob Chernow is a Historian and Biographer whose 818-page biography about Alexander Hamilton served as the main inspiration for the musical. Chernow reviewed over 22,000 archival documents and research papers about Hamilton, including many of Hamilton’s own writings in order to write the book. After publication, it stayed on the New York Times bestseller list for 3-months, and Chernow also served as historical consultant on the musical.
Other notable works:
The House of Morgan (J.P. Morgan) (812 p.)
Titan (John D. Rockefeller, Sr.) (774p.)
Alexander Hamilton (818p.)
Washington: A Life (904p. + Pulitzer Prize for Biography)
Grant (Ulysses S. Grant) (1,104p.)
“If Washington is the father of the country and Madison the father of the Constitution, then Alexander Hamilton was surely the father of the American government.“
Rob Chernow on Hamilton
Lin Manuel-Miranda
Lin-Manuel Miranda is an actor, songwriter, and producer who wrote all the song lyrics for Hamilton: The Musical which first hit Broadway in 2015. Hamilton won 11 Tony awards (16 nominations), and a Pulitzer Prize for Drama. The Musical has been so famous and popular that it had 7 US productions, and 2 international productions (including Hamburg and Sydney), as well as a full-length movie released on Disney+ in July 2020.
Other Notable Works:
In The Heights (Broadway, 2008) – 13 Tony nominations (4 wins) + 1 Grammy
Bring It On: The Musical (Broadway, 2012)
Hamilton: The Musical (Broadway, 2015)
Moana (Disney, 2016) – He wrote the songs
Mary Poppins Returns (Disney, 2018) – He was the chimney sweep
“America then, as told by America now.”
Lin-Manuel Miranda on casting non-white actors for the Founding Fathers
(In the 2020 census, there were nearly 40% “non-white” respondents.)
Alexander Hamilton
Alexander Hamilton was one of the seven most important Founding Fathers of the US (including John Adams, Benjamin Franklin, Alexander Hamilton, John Jay, Thomas Jefferson, James Madison, & George Washington).
Notable works:
Influential interpreter & promoter of the U.S. Constitution
Main writer of The Federalist Papers (51 of 85) that argued for ratification of the U.S. Constitution
Founder of the nation’s financial system, the Federalist Party (which dissolved after his death), the United States Coast Guard, and the New York Post newspaper
First secretary of the treasury & the main author of George Washington’s economic policies
Led the federal government’s funding of the states’ debts
Established the nation’s first two de facto central banks, the Bank of North America and the First Bank of the United States
Established a system of tariffs & friendly trade relations with Britain
“I have resolved…to reserve and throw away my first fire, and I have thoughts even of reserving my second fire – and thus giving a double opportunity to Col Burr to pause and to reflect.”
Alexander Hamilton reflecting on & writing about his upcoming pistol duel with Aaron Burr
Hamilton: The Musical
Hamilton: The Musical is broken into two Acts with an Intermission between them. Each Act contains 23 songs on the album, although there is a 24th song in Act one that wasn’t released on the album. Additionally, each Act runs approximately one hour and eleven minutes:
Act 1: 24 songs, 1:11:11+
Act 2: 23 songs, 1:11:27
The following video shows the “Best 20 Hamilton Songs” as ranked by WatchMojo. For the most part, I agree with this list, but there are a few others that I starred in the lists below that I also think are quite good.
Overall, the entire musical is a lyrical phenomenon, so it’s hard to judge between them. But this is a pretty good list to get started with.
I’ve also provided links to the Wikipedia page for each song (where one exists), as well as the full lyrics, and the Namu Wiki page for my Korean students to have a better time understanding.
Act 1
In which Hamilton joins the Revolutionary Army in the battle for independence from England.
Act 1 can be broken into two parts of relatively equal length:
The duel with Aaron Burr is the most (in)famous part of Hamilton’s life, and before the Musical, probably one of the only things (besides his face on the $10 bill) that many children in the US would remember about his life.
And given the significance of this event, I thought it would be good to include the song from the Musical that details it.
In the song:
“Burr and Hamilton travel to New Jersey for the duel. Burr reflects on the moments leading up to the duel, stating that one of them will have to die. Burr and Hamilton walk the requisite ten paces, with Burr firing first, and time freezes as Hamilton reflects on his legacy, before throwing away his shot. Burr shoots him between the ribs and Hamilton eventually dies, mourned upon by Eliza, Angelica, and the rest of the cast. Burr laments that though he survived, he is cursed to be remembered as the villain who killed Hamilton.” (Wikipedia)
So, Hamilton is dead, but Burr’s life is destroyed. Though he was the third Vice President of the US, along side Thomas Jefferson as President, he would never again hold any public office.
Finale
As a final note, and to further prove the popularity and cultural relevance of Hamilton: The Musical, here is a “Weird Al” polka of Hamilton. In the US, you know you’ve “made it” to the big time whenever Weird Al does a parody or a polka of one (or more) of your songs.
This presentation was put together as a kind of “cultural study” for the Jeonju University Teacher Trainer program in July 2020. I introduced DC and Marvel comics, and detailed many of the differences and similarities between the two biggest comic book publishers in the US.
“Slugfest: Inside the Epic 50-Year Battle Between Marvel and DC” by Reed Tucker was instrumental in helping me prepare for this presentation.
Usually, the Teacher Training program I’m involved with goes abroad during the school vacation periods for additional training and cultural experiences in a Western country (USA, Canada, England, Australia, etc). However, since 2020, due to the Covid-19 pandemic, travel abroad has been canceled. Therefore, it has become the responsibility of the regular teachers of the program to provide that additional training and cultural experiences to the best of our ability IN KOREA.
As a part of this additional training, I was asked to present on:
Superhero comics (due to the increasing popularity of Marvel and DC movies)
American history or culture (I selected Hamilton: The Musical – the presentation can be found here)
Gained popularity in the 1930s-40s – Eisenhower was president – Great Depression / WWII
Gained popularity in the 1950s-60s – JFK was president – Hippies / Vietnam War
Establishment
Anti-establishment
Capes, yes
Capes, NO
Targeted youth
Targeted young adults
Heroes
DC
Marvel
– Superman – Batman – Wonder Woman
– Fantastic Four – Spiderman – X-men
Depicted as gods, super-powered beings, who were struggling to be human
Depicted as humans, who were accidentally granted super-powers, and were struggling with their new reality
– They had “god” struggles (end of the world) – Unlimited resources – They were flawless, too perfect, clean & tidy, “boy scouts” (and boring) – They were the born good guys, the “perfect” hero
– They had “real” struggles (part-time jobs, girls, etc) – Limited resources – They were flawed humans, imperfect, messy, regular people – Sometimes, they were the “anti-hero” – and struggled with hard decisions
Universe
DC
Marvel
– The art was often perfect – It lacked flair, danger, and energy (especially the covers) – There were individual fiefdoms among the artists / writers (less teamwork) – They didn’t read other books, nor use outside talent
– The are was imperfect and stylized – You could “stand across the room and know a Marvel cover” – There was a cornucopia of creativity (more teamwork) – Not only read other books, sometimes they stole ideas and artists from DC (and vice versa)
– Their characters each exist in their own universes (fake cities, places) and rarely interact with each other – The stories are “one-off” stories, disjointed, not connected – The characters themselves were the stars of the show
– Their characters existed in the same universe, our universe (real cities and places) and could interact regularly – There was a coherent, consistent Marvel universe – The writers & artists often became stars themselves (Stan Lee)
Multimedia
DC
Marvel
The first (and best) to TV & movies – 1966: Adam West’s Batman – 1978: Christopher Reeve’s Superman I
Shoddy movie & TV work at first
The company was innovative in multimedia, risk-taking – They retained all the rights to their characters – Their live action TV shows were their best offering
More conservative and controlling of their universe (less risks) – Sold the rights to their characters to multiple companies – Their animated TV shows were their best offering
The first to publish European style “books” with no ads – 10% direct sales
The first to do “direct sales” – 20% direct sales – Multiple covers for the same issue (collector’s items) – Also offered collectibles and other merchandise
Cinematic Universes
Movies & TV
DC
Marvel
Zack Snyder (Man of Steel director) had been the head of the DCEU – The DCEU was director-controlled
Kevin Feige is the head of the MCU – The MCU is overseen from above
Heroes tended to team up first (Justice League), and branch out into individual films later on
Heroes have individual films first, THEN team-ups (Avengers)
Ex: Superman v. Batman – Characters are straight men (less humor) – The movie tone is dark, gritty, violent
Ex: Captain America: Civil War – Characters are pranksters (humorous) – The movie tone is colorful, humorous, and light
The DCEU has little overlap in its films, and more variety (but this also makes the universe less cohesive, not as strong)
The MCU has one unified vision – all the characters exist together in the same universe and cross over all the time (this requires more planning up front, but has a much bigger payoff in the end)
Scene Fights!
This subsection includes a list of 10 different video essays (from ScreenCrush) that attempt to show where and why one particular movie in one universe worked and another (similar) movie in the other universe didn’t.
Zack Snyder (director of Man of Steel, Batman v. Superman) was the original director of Justice League. However, he stepped down from directorial duties in post-production to properly deal with his daughter’s suicide.
Joss Whedon (director of Avengers, and co-writer on Justice League) stepped in to take over post-production duties.
While Zack Snyder’s vision for the film was darker, Whedon lightened the tone significantly during reshoots, adding in more jokes, and turning it into something more like the Avengers (Marvel) than Zack Snyder’s vision for DC. Ultimately, much of Cyborg’s back story (who Zack Snyder has said is actually “the heart of the story”) was also cut in order to fit the time frame of 2 hours running time.
In late 2017, after fans were disappointed with the Joss Whedon cut of the movie, an online petition gathered over 179,000 signatures to release the original director’s cut. In mid-2018, a website called ForSnyderCut.com was created to support the effort, and later the hashtag #ReleaseTheSnyderCut became a trending topic on Twitter. Finally, in 2021, during the Covid-19 pandemic, WB released a 4+ hour Snyder cut of the film on HBO Max on March 18, 2021 which was try to the original director’s original vision.
The Snyder Cut received significantly higher fan and critic reviews than the Josstice League cut.
Here are three more videos detailing the differences between the two versions of the film:
Actually, this is a good time to introduce just how splintered the rights to different Marvel franchises remains to this day.
Sony owns: All of Spiderman, sidekicks, villains, etc
Universal owns: All of Hulk, etc (and Namor the Submariner)
20th Century Fox owns: All of X-men, etc
Disney (Marvel) owns: Everything else
Winner?
Do you prefer one company or its characters over the other? Which one? Why?
I wonder what the characters themselves might think…
Brand Battle!
For this final section of the presentation, let’s consider some famous rivalries between other big name brands. Do you have one you prefer over the other?
Microsoft vs. Apple
Android (Google) vs. Apple
Microsoft vs. Google
Samsung vs. LG
Adidas vs. Nike
Under Armor vs. Nike
Pepsi vs. Coca Cola
McDonald’s vs. Burger King
Dunkin Donuts vs. Starbucks
Domino’s Pizza vs. Pizza Hut
Facebook vs. What’s App
USA vs. China
Can you think of any other big rivalries? Other big comic publishers? What about Korean comics?
I’ve lived in Korea for 15 years, teaching English (and computers) to all levels, from kindergarten to adult. I spent my first 26 years of life & education in the US, from kindergarten to university. I grew up in a typical American family, and I’m now raising a typical Korean family.
For these reasons, I was recently approached to give a presentation on Cultural Differences between the US (my home country) and Korea (my residence) to a group of high school students in Jeonju.
Now, there are plenty of good blog posts, YouTube videos, and discussions about cultural differences between the US and Korea already available online, so I decided to take a different approach. This presentation will start with a brief overview of some facts and statistics that I’ve gathered from the CIA World Factbook. But then, we will dive into cultural differences that one may experience at certain milestones along a typical life journey “from birth to death” (hence, the presentation’s subtitle).
While I’ve experienced my fair share of culture shock and cultural differences during my 15 years living in Jeonju, I wanted to approach this subject from a slightly different angle. Therefore, I’ve selected a handful of “Life Milestones” that everyone will (likely) experience in some form or another throughout their lives.
I’ll compare and contrast different aspects of these Life Milestones and how each culture experiences them in their own unique ways. Some will be quite similar between the cultures, but others will have wildly different cultural expressions. I hope this presentation will be both interesting and insightful, and that we’ll be able to have a good discussion through it and learn a lot together.
Since I’ve lived for extended periods in both cultures (26 years in America, 15 years in Korea), I am quite familiar with the differences and similarities between cultures and can speak extensively from my own experiences.
At that size, the USA is roughly 100 times larger than Korea! Korea is only:
Slightly larger than Indiana
And slightly smaller than Pennsylvania
Landscape
Korea
Halla-san – the tallest mountain in Korea (1,950m)
An easy way to remember its height is with a Korean expression that encourages tourism by using each number of its height in the sentence: “한번 구경 오세요.” Actually, this is one of my favorite Korean sentences for this very reason. It says, “1번” (one time), “9경” (sightsee), “5세요” (come) = 1,9,5,0 meters high. Cool!~
Though this report is from 10 years ago, even in 2011, Seoul was considered the most wired city in the world. As the home of global brands like Samsung, LG, and Hyundai, and the first country in the world to launch 5G commercially, South Korea is still one of the most wired countries in the world, and a great test bed for new technologies.
Jeonju – largest hanok village in Korea (800+ hanok)
Jeonju is also a UNESCO City of Gastronomy, and the food capital of Korea! It is located in the heart of some of the richest farmland in Korea, and restaurants here serve the most variety, quantity, and freshest side dishes of any place I’ve yet visited in Korea. The food is incomparable!
USA
Denali – the coldest mountain on earth (6,190m, -73°C)
The “crowning peak” of the Alaskan Mountain Range and the highest point in North America.
Permanent snow and ice cover over 75% of the mountain.
Glaciers up to 45 miles (72.4km) and 3700 feet (1127.8m) thick “spider out from its base in every direction.” (source)
Winds of over 150 mph (241.4kph) and temperatures of -93˚F (-73˚C) have been recorded, which is some of the coldest and most violent weather on earth.
Mauna Kea – the tallest mountain on earth (10,200m) above sea level (4,207m)
The highest point in Hawaii and one of 6 volcanoes that formed the island, it stands roughly at the same height that commercial airplanes fly.
It is one of the best sites in the world for astronomical observation and contains 12 sites with 13 telescopes, though the construction of the telescopes has been controversial (indigenous rights, religion, ecology).
Death Valley – the hottest place on earth (-86m, 56.7°C)
It lies near the border of California and Nevada (126.2 miles or 203km to Las Vegas), and is 3,000km2 (7770km2) – almost as big as Jeollabuk-do (8067km2)
The hottest officially registered temperature is 56.7°C in 1913.
That means the USA has over 242 times more land area devoted to agriculture!
People
Population
USA: 334,998,398 (#3 in the world)
Demographics
72.4% White
12.6% Black
4.8% Asian
10.2% Other
Language
78.2% English
13.4% Spanish
1.1% Chinese
Korea: 51,715,162 (#28 in the world)
96.2% Korean
3.8% Non-Korean (1.99 million)
Population Density
USA: 50% of the population lives in 9 states: Califonia, Texas, Florida, Georgia, Illinois, Michigan, Iowa, Pennsylvania, New York
Korea: 50% of the population lives in Gyeongi Province & especially Seoul
Population Pyramids
Korea just isn’t having babies (1.09 children per woman – a negative birth rate), and longer life expectancy (82.78 vs 80.43 in the US) which means there is an aging population, and it’s only a matter of time before the total population shrinks dramatically.
Health
You can see from the graphic that Korea wins on almost every metric.
The US is at least continuing to maintain its population (1.84 children per woman) as you can also see from the previous Population Pyramid.
And although the US does have more Physician Density per 1,000 people, the fact that the US spends more than double the amount of its GDP on healthcare means that this metric is (at least) a toss-up.
Mother’s mean age for her first child is additionally mostly a toss-up, because cultural factors may play a big part in this. But this might also be a big reason why Korea has a negative birthrate – because women are waiting so much longer to start having children. American women, by contrast, have on average 5 years more than Korean women to have children because they are starting earlier.
Nevertheless, all of the other factors, as well as Korea’s technological and economic advanced, prompted the UN Conference on Trade and Development (UNCTAD) to classify Korea as a “developed” economy on July 2, 2021, and no longer merely a “developing” economy. This is the first upgrade for a member state since the body’s establishment in 1964!
Money
GDP (purchasing power parity)
USA: $62,530
Korea: $42,755
GDP Composition
USA
Agriculture (0.9%)
Industry (19.1%)
Military (3.7%)
Education (5%)
Healthcare (16.9%)
Other Services (54.4%)
Korea
Agriculture (2.2%)
Industry (39.3%)
Military (2.7%)
Education (4.3%)
Healthcare (7.6%)
Other Services (43.9%)
Education
Korea
Elementary (1-6)
Middle (1-3)
High (1-3)
USA (alt #1)
Elementary (K-6)
Junior High (7-9)
High (10-12)
USA (alt #2)
Elementary (K-5)
Middle (6-8)
High (9-12)
School Year
Korea
Year: March – July, September – January
Vacation: August, February (2 months total)
Hours: 8:30am – 4:30pm? (or 11:30pm?)
USA
Year: September – December, January – May
Vacation: December – January (1 month), June – August (3 months)
Hours: 8:30 – 3:00pm (or 6:00pm?)
More Education Differences
In the US:
No uniforms: only 19% of schools require uniforms
Students move classrooms: there is no “home room” so in the 10 minute breaks, students have to travel through the halls, go to lockers, etc.
Less days & times: US schools are in session for shorter hours, plus require less minimum school days per year
USA: 180 days (and way more holidays!)
Korea: 220 days
Extracurricular activities:
In school: students are encouraged to join sports, clubs, and leadership (Student Council)
Out of school: students get part-time jobs, date, and just hang out
But also, in the US, there are more fights, drugs, skipping, vandalism, threats, etc.
A Typical Day in High School
Military
Korea: Compulsory
1.5 years
$450 / month salary
USA: Voluntary
Typically 4 years minimum, up to a full career (11 years average)
Starting salary: around $2,000 / month
But also includes multiple bonuses, paying for school, etc
Break time!
Any questions?
Life Milestones
My wife brought home the “Visit Korea” book here the other day, and one of the first articles I noticed was touting some 8 top benefits of visiting Korea. I thought it would be interesting to compare these to my personal experiences in the US:
Safe Streets & Low Crime Rate
USA: Yes, mostly, except in certain places at night
USA: There are more Spanish language signs and announcements popping up than when I was a child
Excellent & Fast Medical Services
USA: But much more expensive than in Korea (by about 10x in my experience)
Wi-Fi Heaven
USA: In Starbucks… But there is no wide-spread wifi, nor Internet cafes on every corner.
No Cash, No Worries!
USA: Yes, the card is king. But the US still uses LOTS of checks, and direct deposit, e-taxes, and other digital conveniences still aren’t widespread.
Convenient Public Transportation
USA: Well, some places. But there are also lots of complaints about that…
Fast & Easy Delivery
USA: In my experience, only pizza, and maybe Chinese, does delivery. Perhaps that’s changed?
(Keep in mind, I am from a small town in Wyoming, so my experiences are not necessarily reflective of more developed and larger cities.)
Life Stages
I’ve broken these Life Stages down into three main sections:
Youth – including childhood & schooling
Adulthood – including career & family
Elderly – including aging & retirement
Here they are in detail:
Youth (~18% of life)
0-5: Infancy
6-11: Elementary
12-18: Middle / High school
16, 18, 21: “Coming of Age”
18-21: University?
Adulthood (~48% of life)
21-30: Figuring Yourself Out
31-40: Family? Career?
41-50: Career! (Midlife Crisis?)
51-60: “Over the Hill”
61-66: The End (of career) is Near
Elderly (~34% of life)
66-70: The “Golden Years”
71-75: Aging
76-80: Slowing
81-85: The “Twilight Years”
86-100?: THE END
The remainder of this presentation contains many questions that I hope will lead to a good discussion with the participants. Each of these topics is lengthy and could lead to its own discussion or presentation, so I’ll try my best to keep things brief.
This presentation was for the Teacher Training program at Jeonju University. With this presentation, I coupled together (and updated) a few of my most well-used presentations for the program, including a PPT on Internet Security, the previous Teacher Tech Tips, and an overview of some of the technology options we had for things to study in the course.
Teacher Tech Tips Update
This talk is an updated version of a similar talk I gave in 2017. It combines that talk with another presentation I’ve given to my high school classes on Internet Security and Safety, as well as introduces possible app options to learn during this Teacher Training course.
There are THREE main topics to discuss in this presentation:
Phishing is a type of social engineering where an attacker sends a fraudulent (“spoofed”) message designed to trick a human victim into revealing sensitive information to the attacker or to deploy malicious software on the victim’s infrastructure like ransomware. – Wikipedia
In other words: Phishing is a false email or message you receive that purposefully attempts to get you to compromise your security in some way.
Questions to Consider:
Do you know someone who has been scammed? What happened?
What is the purpose of a scam? What are some tricks people use?
What kinds of personal information might someone try to get? How do they get it?
Commonalities in Phishing Messages:
They want you to verify your account information (online)
Because they alert you that “your account is in trouble!”
And there’s a sense of urgency
You can find English spelling or grammar errors (very common)
There’s often a link provided (which can be disguised)
Or some kind of attachment (also disguised, potentially hiding a virus)
Or the message sounds too good to be true (“You’ve won $1 million!”)
And often there is a generic greeting (“Dear Sir / Madam”)
The PPT gives THREE examples of phishing emails. Can you notice what is “off” about each one? What clues give away their phishing intention?
Hacking
What is Hacking?
Hacking refers to activities that seek to compromise (by breaching defenses, or exploiting weaknesses in) digital devices, such as computers, smartphones, tablets, and even entire networks. – MalwareBytes
Can you read the following message? It’s written in Leet:
K33P C4LM 4ND 5P34K L337
In English, it reads: “Keep Calm and Speak Leet.”
Leet is basically a kind of modified spelling of English words that replaces some characters with numbers or symbols that look similar to the English letters they are replacing.
It’s also a GREAT way to stay safe on the Internet. By using a password or passphrase that includes symbols or numbers in place of similar-looking letters, you can create a password that is relatively easy to remember but hard to hack.
Password Tips
NO
Dictionary words or very common words (nor combinations of 2 or 3)
Not short – shorter = weaker and easier to hack
Not easy to guess information like your birthday, or your mother’s name, or any information that can be easily found on your Facebook profile
YES
$ymbol$, L337$p3@k (Leetspeak), etc
Longer = stronger
Sometimes patterns are helpful – for example, on social media, create a passphrase that reminds you of your purpose on each platform:
onFacebookIpostpics4family
A passphrase is much stronger than a password
For example: mymothertoldmetoalwaysbecareful even though it doesn’t use any special characters, numbers, nor Capitals, is MUCH stronger than 5@f3tY!1st (safety!1st) and much easier to remember
Now, while we’re on the subject of passwords, let’s also talk about the difference between Single Sign-on methods (logging in with Facebook or Google, etc) and the traditional email/password login method.
These ARE NOT the same, so please don’t be confused.
In a basic sense:
Single Sign-on
Facebook or Google, etc manages your private data, user profile information, and so on
When you click the SSO button, you sign in to THAT site
Then THAT site provides THIS site with a special TOKEN proving you are you
Then you get access to THIS site
Traditional Login
THIS site records your email and password and stores it in its own database
THIS site manages your user profile information
When you click the login button, THIS site checks your email / password combination against its database to verify your identity
If your email / password combination is correct, you get access to THIS site
In sum:
Single Sign-on is managed by Facebook, Google etc, and retains NO email / password information for you in THIS site – you are logged in with a TOKEN
Traditional Login is managed entirely by THIS site, and THIS site retains your email / password data, which is used to log you in. There is NO connection to Facebook, Google, etc using the Traditional Login – it only remembers your email (but is NOT connected to it)
Pros & Cons
Personally, I prefer SSO logins to Traditional logins for a number of reasons:
It’s easy and streamlined
I don’t have to create ANOTHER account and remember ANOTHER password
It already links to my verified profiles on social media
With updated accurate info and profile pictures
I can link other accounts to the service or site as well
There are less failed logins
Less abandonment of the site
And greater user adoption
There are a few disadvantages we can talk about as well though:
Security issues
If the major website is compromised (hacked), then your information that’s stored on it will also be compromised (but Facebook / Google are huge and have enormous resources – more than THIS site – to combat that)
Also, it can promote bad password practices like reusing the same password everywhere for convenience
Privacy
Additionally, by logging in to Facebook / Google on THIS site, you will be allowing these services to track your behavior and display targeted ads here
Also, your social data is essentially completely “open” and accessible to THIS site once you login
But personally, I still find SSO to be far more convenient, and I can deal with the disadvantages it provides.
But remember:
If you JOIN the site with SSO
You ALWAYS have to login with SSO
You can’t use your email / password in the login fields
Social Engineering
What is Social Engineering?
In the context of information security, social engineering is the psychological manipulation of people into performing actions or divulging confidential information. – Wikipedia
One of the best movies that highlights social engineering is Catch Me If You Can (Amazon affiliate) with Leonardo DiCaprio and Tom Hanks:
The most basic principle to always keep in mind when it comes to Internet, computer, or even building security is:
YOU are always the weakest link
Let’s take a look at some of the most common social engineering methods and tactics below. Click the links for more information:
Protect yourself from social engineering by keeping the following principles in mind:
Be skeptical (trust no one)
Don’t open suspicious (unexpected) emails (or messages)
Mark suspicious messages as “Spam” or “Junk” (this helps everyone)
Don’t click links in messages (hover over them to double-check the destination, or copy-paste the link in your browser window as links can be disguised)
Check URLs (look for HTTPS (“s” for “secure”) and make sure the URL is real)
Don’t enter your personal information, particularly NOT passwords or credit card information into websites you’ve linked to from outside sources
When in doubt, call customer service to verify the email or message
Create strong passwords (passphrases)
Always remember to install security patches and updates (which fix vulnerabilities that have been exploited)
This portion of the presentation was originally given as part of a training seminar at Global Prodigy Academy international high school in Jeonju. Please view the following link for that presentation in its entirety:
The majority of that presentation remains the same in this updated version with the exception of Multiple User Profiles, in both Chrome and Windows, which we’ll look at in more depth after the Useful Computer Tricks section.
Useful Computer Tricks
The following are some of THE very best computer tricks for teachers I’ve picked up over the years (and use on a nearly daily basis):
Browser Tricks
CTRL + SHIFT + N = Chrome’s Incognito mode (doesn’t save passwords, browsing history, etc)
CTRL + SHIFT + T = Re-open the most recently closed tab
In Gmail, with keyboard shortcuts enabled: C = compose new message
Also in Gmail, type SHIFT + ? to view a pop-up of ALL of Gmail’s keyboard shortcuts
And in Google Docs, a quick way to Strikethrough anything you don’t want is to highlight it and press ALT + SHIFT + 5
We’ll talk about Multiple Chrome users in the next section
Windows Shortcuts
CTRL + ALT + DELETE = Slow, additional step to Task Manager
But CTRL + SHIFT + V removes styling from the text you copy-paste
CTRL + K = create hyperlink from selected text
CTRL + Z = undo
But CTRL + SHIFT + Z = redo
Multiple Users
For me, discovering that it was possible to create multiple Users in Chrome and Windows has been a real game changer.
I used to need to login to multiple different email accounts constantly throughout the day in order to get some work done. And after a time, some accounts would be automatically logged out. And I’d often loose track of what I was working on, or which tabs I needed open for different tasks.
But with multiple Chrome users, I’m able to separate the tabs and emails I’m using for different accounts quite easily, and keep them separate. I open a different User account whenever I need to switch tasks.
The same is true for multiple Windows users. By creating multiple users in Windows, I’m able to keep my files and programs separate from everyone else in my family who also uses the same computer.
In this way, whether in Chrome or Windows, each user profile, and all their content and settings, can be customized to the particular user who needs it.
Acceptable Use Policies
What is an Acceptable Use Policy?
An acceptable use policy (AUP) is a document stipulating constraints and practices that a user must agree to for access to a corporate network or the Internet. Many businesses and educational facilities require that employees or students sign an acceptable use policy before being granted a network ID. – WhatIs.com
This is something that came up a few times at the high school I was working at. In principle, the high school owns the email accounts and all the computers that students and faculty use while at school. So, any inappropriate use can be disciplined by the school.
Examples of inappropriate use:
Student: bullying classmates via the school email, looking at inappropriate things on the school computers, harassing or attempting to blackmail teachers with the school email
Teacher: job hunting with the school email, looking at (or showing) inappropriate things on the school computers, etc
General Guidelines:
I think it is always a good idea to remember WHICH email account you are using when you send messages, and WHO OWNS the email or the devices you are using. Here are some general AUP guidelines to help you stay safe:
Keep things professional (at all times)
Your school / company owns your school email, office device, etc
Scheduling / socializing with students outside school hours (including instant messaging) needs to be handled with caution, and is not recommended
Keeping door codes & computer passwords secure is important (beware of writing down passwords near your computer, or students looking over your shoulder as you type the password or enter the door code)
A zero-tolerance policy for bullying and harassment might be advisable
In this Teacher Training course – which runs for 18 weeks – we will study many of the following apps. I’m presenting this list to you here for future reference and also to see which you may have heard about and which you may be interested in learning more about.
Anything with a red asterisk * is what we will definitely study. After Row One (Google tools), apps are presented in alphabetical order.
Row ONE
* Google Classroom (Publish class content, collect & grade assignments)
*Google Docs (Collaborate on assignments, create books / journals)
From a classroom teacher’s perspective, what kinds of tasks is Google Classroom most effective for? How can Google Classroom enhance lesson planning, homework assignments, grading, and keeping parents informed? Come investigate how Google Classroom can help teachers manage the SIX most common teacher tasks. Can’t use Classroom? No problem, I’ve got alternative solutions available as well.
I’ve given numerous presentations on Google Classroom and G Suite before:
But for this presentation, I decided to refresh some of what I’ve already covered and take a look at Google Classroom from the perspective of a classroom teacher’s typical task list.i.e. What kinds of tasks would a teacher require of Google Classroom in order to make it useful for their work?
I came up with 6 common tasks that I feel every teacher needs to manage well.
6 common teacher tasks
The following YouTube video from Google demonstrates the application of Google Classroom to these 6 common tasks, and the rest of this article will be spent going over exactly HOW to perform them.
1. Organization
Keep yourself organized & on task!
Probably the number one best reason why I personally use Google Classroom is because it helps me better organize my own classes.
Even in situations where Google Classroom is not an option for students to use, I often utilize the Classwork Tab for myself because of the how well I can keep myself organized and on task with it. In the Classwork Tab, teachers can:
Create (or reuse and edit) assignments
Organize them by topic
Write out full lesson plans or notes
(Then refer to this when lecturing)
Add relevant files to share or use in class
Schedule the assignments for a later date
CAN’T USE CLASSROOM?
Whether or not your students can use Google Classroom, it’s still a great option for yourself as a teacher.
2. Distribution
Go paperless! Throw out the USB!
The second biggest reason to use Google Classroom (and Drive) is to be able to run a completely paperless classroom and get rid of your USB.
Personally, I haven’t used a USB stick for over 10 years because running around from computer to computer with an unprotected USB stick is like running around maskless during Covid-19. Eventually, some computer will infect your USB with a virus, which you’ll then likely spread to multiple other computers before you even realize it.
Additionally, Google Classroom keeps your class files organized inside class folders and assignment folders contained inside your Google Drive. When you Create an Assignment for students in your Classroom, you can virtually distribute a copy to everyone at once, and Google gathers those into a folder for you. You can access each student’s file later from within either the Assignment post in Classroom, or the assignment folder in Drive.
First, be sure all students are already IN your class (with a join code or email)
(If not, then when you distribute something with an Assignment, the students who aren’t in the class won’t get a copy, and you’ll have to do it again.)
Then, in the Classwork Tab:
Create (or reuse) an Assignment
Add relevant files
Set the distribution option to “Make a copy for each student”
Assign it!
Can’t use Classroom?
I had a situation once where I had almost 50 students in a single class, but not all of them had Gmail accounts. Rather than forcing them all to register for a Gmail, and then join my class, I created a Google Site where I distributed handouts, and used Google Forms to gather self-graded homework.
Google Classroom also automatically collects and organizes all your class files in a single folder inside your Google Drive.
As soon as your Create a new Classroom, Google makes a new folder for that Classroom directly inside your Google Drive and links it within your Classroom at various locations (wherever you find the folder icon as pictured above). Within the Classroom folder, Google additionally creates new folders for Assignments in two special ways:
Whenever you create an Assignment to distribute to students, Google saves a copy of that file inside a folder in your Drive called “Templates – DO NOT EDIT.”
And any time student work is distributed, Google also creates a separate folder for each Assignment where the student work will be automatically collected for you when the students hand it in.
After creating, distributing, and collecting a few Assignments, your Classroom folder structure (within Drive) will look like this:
My Drive
Classroom
Writing Class 101
Templates – DO NOT EDIT
[file] Personal Introduction (Original Worksheet)
[file] Book Report (Original Worksheet)
[file] Poetry Analysis (Original Worksheet)
Assignment 1: Personal Introduction
John – Personal Introduction (Turned in)
Frank – Personal Introduction (Turned in)
Assignment 2: Book Report
John – Book Report (Turned in)
George – Book Report (Turned in)
Assignment 3: Poetry Analysis
John – Poetry Analysis (Turned in)
etc…
Can’t use Classroom?
There are two main options for (digitally) collecting and organizing student work without using Classroom:
Have students submit work via email. You can collect those and manually organize them in your Google Drive according to a similar folder structure as listed above (a classroom folder, then a folder for each assignment).
Collect student work with a Google Form. Google Forms now allows you to include a “File Upload” Question Type. You can select allowed filetypes, quantity, and file size. (Be careful not to allow files that are too large, and keep an eye on your folder space usage, or you’ll quickly run out of storage space.)
Be careful of the storage space that is used up when students upload files so that you don’t go over your Google Drive limit.
4. Correction
Use a rubric, leave comments, assign a grade.
When creating an Assignment, Google Classroom makes it very easy to add a rubric to any Assignment, such as the one pictured in the right sidebar.
Additionally, in the right sidebar, near the top, you can view a collection of all the student’s Files for this Assignment. Then, after leaving comments (at the bottom, or in the Document itself – as pictured), you can also “Return” the Assignment to the student with the blue button at the top right. Or, wait until you’ve graded and commented on ALL the students’ Assignments and click the blue dropdown button to the right of “Return” and you can choose to “Return ALL” to every student at once!
Another great grading feature in Classroom is that Google is able to load consecutive student work at the click of a button. Underneath “Screenplay” in the upper-left side of the image, you can see a student’s name. To the right of the name are left / right arrows. When you click the arrows, Google loads the “next” or “previous” student’s work.
Or, click the student name itself and a dropdown appears with ALL the students in the class. Beside each name will be a status marking whether the work is “Late” or “Not Submitted” or a point value if it’s graded.
Can’t use Classroom?
You can still grade student work in at least two ways:
If the assignment is a Quiz, create a self-graded (or auto-graded) Quiz in Google Forms, select the correct answers, assign point values to each question, distribute it via email, and wait for students to answer the quiz and their scores to be recorded.
If the assignment is more subjective, like a writing assignment, you can highlight things, change things, and leave comments for students directly in Google Documents.
Insert Comments with CTRL+ALT+M or by clicking directly in the light gray sidebar in Google Docs.
Or, change the Document mode to “Suggesting” rather than “Editing” so that every change you make will be clearly marked and students will be able to “accept” or “reject” your corrections.
5. Analysis
Need a gradebook? Graphs?
Google Classroom automatically creates a gradebook for you as you start creating Assignments and grading them.
You can view the gradebook at any time in the “Grades” tab within Classroom to get a full overview of the class, including viewing or updating any grades. You can also see which students still have “Missing” work. If you update or assign grades directly in the gradebook here, you can click the three dots menu beside the Assignment name to “Return All” student grades and work at once.
Can’t use Classroom?
As mentioned above, you can still collect grades with a self-graded Quiz using Google Forms. Google Forms also provides great tools like graphs of right and wrong answers for each question, individual reports, and so on.
The feature to “Invite Guardians” only applies to G Suite for Education instances (where a school is using G Suite, not on personal Gmail accounts), but it allows a Teacher to link a parent or guardian email with a particular student email. Then, the parent or guardian also gets the same updates about the student’s progress that the student gets. This includes all Assignment notifications, grading, comments, and returned documents.
Can’t use Classroom?
If your account is a personal Gmail account, so that you can’t link guardian emails to a student account, or if you just can’t use Classroom, you can still keep parents in the loop with the traditional method of sending emails.
Or, take another look at the Google Site I created for one of my classes (shown in #2. Distribution above), and consider creating your own Google Site for parents and students to bookmark and use to keep updated about the happenings in your class.
Conclusion
The big takeaway from this presentation is:
Google Classroom is not perfect, but it is a tool that can (and should) be leveraged to your advantage for better classes.
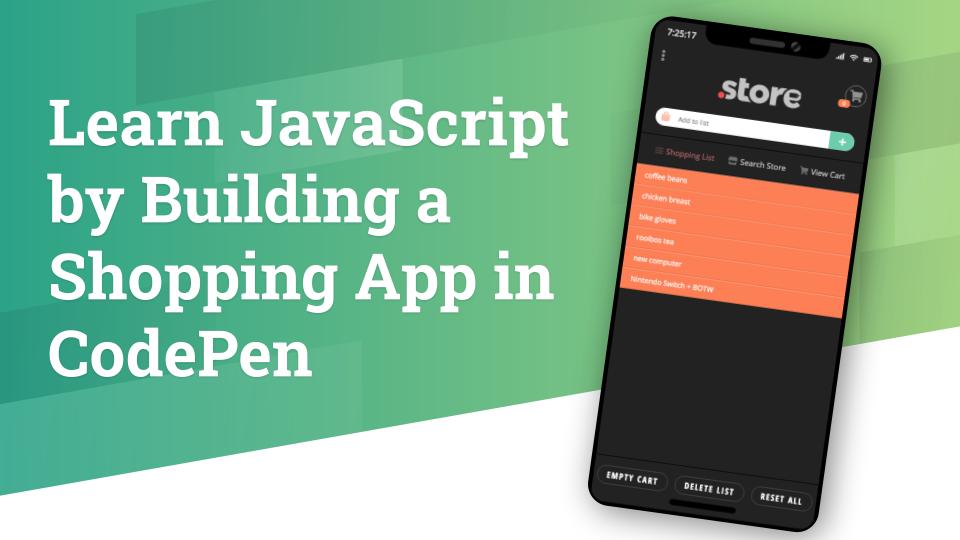
Learn by doing! The best way to learn JavaScript is with projects, so we’ll be building a shopping app in CodePen.
In this tutorial, we’ll learn how JavaScript can manipulate data and the DOM to create a multi-screen, dynamic web app, right inside CodePen. We will walk through the app-building process together: from creating app screens in HTML & CSS, to adding basic JavaScript functionality with button presses, to adding basic data processing. This tutorial is aimed at beginner developers.
Lesson Outline
The following is a tutorial that was presented at JS Conf Korea 2019 on September 3, 2019. It is a 4-part tutorial. The first part (Introduction & Overview) is presented here, but the other three parts are part of an online course I’m creating.
As you may have noticed in my bio, my name is Aaron Snowberger, and I’m a frontend designer/developer who likes to dabble in backend and mobile technologies. My current passions include React, React Native, Node, and the WP REST API. I’m also a Google Certified Trainer who has taught computer science and graphic design in high school since 2013. I’m passionate about helping new learners discover the joys of JavaScript.
The web project this tutorial introduces is for a project that I built with my high school students in the Spring 2019 semester.
My class began the project with a review of HTML structure and CSS styles in order to create the overall look and feel of the web app. But the project’s main focus was to introduce my students to the beauty of JavaScript, and that is what the bulk of the tutorial will cover.
Why JavaScript
There are many reasons why JavaScript is a particularly useful programming language for new learners. Here are just a handful of them:
JS is the third leg of the code-tripod that builds websites. Whereas HTML & CSS are not really programming languages per se (they are markup languages concerned with presentation, not function), JS is actually a functionalprogramming language that can create interactive applications – and not just online brochures.
JS is everywhere. The majority of the world’s websites utilize JavaScript somewhere – it provides much of the interactivity on a site – and it can also be used to build mobile applications (React Native, NativeScript). As such, the majority of the world’s population with access to the Internet is in contact with JavaScript on a daily basis.
JS is noob-friendly and (relatively) easy to learn. Compared with many other true programming languages, JavaScript’s syntax and key concepts are rather straightforward and relatively easy to learn. So much so that middle school and high school students can pick it up, and there are even some block-building languages (like Blockly and Scratch) which are based on JavaScript and taught to even younger students. JavaScript is also one of the easier languages to debug.
JS is also quite powerful. Some of the top websites in the world like Facebook, Instagram, AirBnB, and Netflix utilize JavaScript in their webpages and mobile apps. JavaScript can be used to power either the frontend or the backend of websites, and there are hundreds of very powerful frameworks and libraries of code available to work with.
JS is undoubtedly fun to work with. By its very nature, powering websites and providing their functionality, JavaScript is highly interactive and visual, giving you the ability to build animations, powerful UIs, games, and apps. Plus, it’s even more fun when you realize you can build something that millions of people around the world can enjoy together.
Learning JS can lead to a bright future. The JavaScript ecosystem is rapidly evolving and has seen much growth and change in recent years. As such, JavaScript skills are in high demand and salaries for skilled JavaScript developers are also high. Additionally, by learning the fundamental concepts all programming languages share (loops, conditionals, functions, classes, and so on), students can more easily pick up skills in additional – or more difficult languages as well.
About the Shopping App Project
AKA “How we’ll build this…”
JavaScript is primarily used to access and modify elements within a website. Therefore, we need to learn JavaScript by coding a project that has multiple moving parts, buttons, and interactive elements. A shopping app provides just such an opportunity.
Project Considerations
Each of the three “screens” in this app will be discussed in more detail below, but here is a quick overview of what we want each screen to do and how.
Shopping List Screen
Performs like a To-Do List
We click a button to “add” or “remove” an items from the list
Type in the input field to “create” a new item (task)
Drag an item to the side to “delete” it (animate this)
Include Reset buttons to restore the original list to its defaults
Also include additional visual feedback (CSS animations) so the user can see what effect their interactions are having on the app
Store Screen
This needs to include a collection of data – say at least 20 different items we can Search through and Add to our cart
We want to be able to change the View Type (from list to grid and vice versa – CSS Grid is a perfect tool for this)
We want to include filters such as Category, Price, and so on
We also want the Store to be searchable
We need to include some functionality to “Add” items to our cart so that when we click over to the Cart Screen, those items are there
We also need some kind of animation or visual feedback for the user (this can be handled with pop-up “Toast” notifications)
Cart Screen
The cart will contain “cloned child nodes” from the Store Screen when the user clicked “Add to cart”
It needs to be able to dynamically update quantities and prices
And we also want to include some kind of nifty Checkout progression or modal and possibly a nice “shipped out” animation
First, some notes on HTML & CSS
HTML Structure
Use semantic markup (<nav> or <aside> rather than always <div>) & descriptive class names (like "shopping-list-item")
This helps you to think in a more modern, modular style when you build the structure (like components) first
CSS Style
Some useful visual indicators and design tools include:
My personal favorite design touch is using a dark bottom-border and light top-border on each list item – to give the appearance of three-dimensions and shadows
Animations & keyframes also allow us to give visual clues to the user by doing things like jiggling the Cart icon when an item is added or removed
Additionally, transforms, opacity, and positioning can help us a lot
CSS Grid & Flexbox are also particularly useful tools (especially since React Native utilizes flexbox, so it’s good practice here if we want to work with React Native later)
1: Shopping List
Originally, this shopping app was designed to behave primarily like a To-Do list. So, it was more like a shopping list app that incorporated the following:
A pre-built list of items
To which new items can be added (input field)
Items can be clicked on and marked as completed (purchased) with a strikethrough
Or items can be removed from the list altogether (by dragging it off the screen)
After these initial functions were built, it seemed like a good idea to allow users to also do them in bulk, so the following buttons were added:
Empty Cart – systematically goes through the list of items and removes the strikethrough, also returns the cart number to zero
Delete List – systematically (and programmatically) removes each item from the list by “dragging” it off the screen in order
Reset All – systematically resets the list to its original defaults by adding all the items back in
In addition to the functionality listed above, in order to provide adequate visual feedback to the user, CSS transitions, animations, and pseudo-elements were added to make the app appear as though every button click or input was having a (non-simultaneous) effect.
This meant that all the functionality of the app was given a 300-1200ms transition, for adding, deleting and so on. “Purchased” items appear to float up “into” the shopping cart, and bulk actions don’t happen all at once, but sequentially with a short delay between each item.
Shopping List Toolbox
The following is a list of necessary JavaScript knowledge to add to our mental toolbox in order to build the Shopping List screen:
Checkout the finished product in the CodePen below. Investigate the JS code in the editor to learn how it all works.
Completed Shopping List Screen.
2: Changing Screens
Technically, this is not another screen that we need to code, but rather the ability to seamlessly transition between screens. Therefore, it deserves its own subsection in which to discuss WHAT we want to do and HOW we want to do it.
Considerations:
Let’s make the screens appear to shift from left to right as we click between them. This means we need to make the width of our app <div> at least as wide as three screens, and then we want to absolutely position it where it needs to be for each visible screen.
Additionally, we need to change how the input field works:
On the Shopping List Screen, it adds items to our list
On the Store Screen, it should search the store
On the Cart Screen, it should search the cart
And of course, we want to add some Toast notifications (pop-ups) to indicate to the user what is going on
Changing Screens Toolbox
The following is a list of necessary JavaScript knowledge to add to our mental toolbox in order to build the Change Screens transitions and functionality:
Additionally useful is being able to Add External CodePens into your next working model with CSS or JS code pre-built. This can help you to separate out different features and keep you CodePen code a little simpler.
For example, after building the Shopping List Screen in the previous section, I load its CSS and JS into every other CodePen I create (all the other Screens) to carry over its styles and functions.
Let’s build the Change Screens functionality!
Checkout the finished product in the CodePen below. Investigate the JS code in the editor to learn how it all works.
Completed Change Screens transitions.
3. Store
This is Screen #2 that we will build, the Store. You can see from the screenshot that this screen adds our collection of data (stored in a JavaScript array), a few interactive buttons on the store itself and on each item, and changes the input field to search for items in the store. Let’s run over our considerations for the Store Screen once again:
Considerations
Collection of data – say at least 20 different items (stored in a JS array)
Buttons to change the View Type (from list to grid and vice versa – the grid icon at the upper-right corner of the store is what we’ll use)
Filters: Relevance – Lowest Price – Highest Price
Search bar: although not instantaneous search, when ENTER is pressed, it returns (and displays) an array of the relevant items as well as a notification for the results it found (and an “x” button to clear the search) – see below
When “Add to Cart” is pressed, we need to clone the DOM node and add it to the array of items that are present in our Cart screen (so that when we click over there it will already be in the Cart)
Store Screen Toolbox
The following is a list of necessary JavaScript knowledge to add to our mental toolbox in order to build the Store screen:
Checkout the finished product in the CodePen below. Investigate the JS code in the editor to learn how it all works.
Completed Store Screen.
4. Cart + Checkout
The third and final Screen we need to code for our app is the Cart Screen which will include a Checkout modal. Each item that we “Added to Cart” in the Store screen appears in our list here (as cloned DOM nodes).
Beneath the Cart list (not pictured) is a “Checkout (3)” button – with the quantity of items to purchase, and a “Total: $” field, both of which are dynamically updated as we add (or remove) items in the Cart.
Above the Cart list, is the Checkout modal progression: REVIEW – PAYMENT – COMPLETE. When we click the “Checkout (3)” button, this should take us through the full payment process to a “shipped out” animation at the end.
Considerations
Cloned child nodes are absolutely necessary to make the app function seamlessly between Store and Cart screens. This is because we are not actually loading different screens and passing data between them, but instead we continuously remain on the SAME page, and just push a different area into our iPhone screen based on the section of the app we want to load. Therefore, when we “Add to Cart” we actually need to create an identical copy of the DOM node that contains the item and add it to the Cart section.
Dynamic updates (in price or quantity) are controlled and managed with JavaScript’s MutationObserver that detects changes in the DOM and can respond accordingly, as well as custom HTML data attributes to retrieve the relevant information we need.
The Checkout Modal is a straightforward implementation that requires no special implementation methods.
Cart Screen Toolbox
The following is a list of necessary JavaScript knowledge to add to our mental toolbox in order to build the Cart screen:
JavaScript
Useful functions
.cloneNode() – to copy the DOM node containing our desired item
This JavaScript feature in particular was the most important thing that I discovered while building the app. There is no other way to listen for changes in the DOM and respond to them without reloading the page.
Checkout the finished product in the CodePen below. Investigate the JS code in the editor to learn how it all works.
Completed Shopping List Screen.
Just Keep Learning
I hope you found this tutorial session informative and interesting! And I encourage you to always “Just Keep Learning” and experimenting, building new projects, and trying things out. Below is a list of helpful resources you might find useful in your journey.