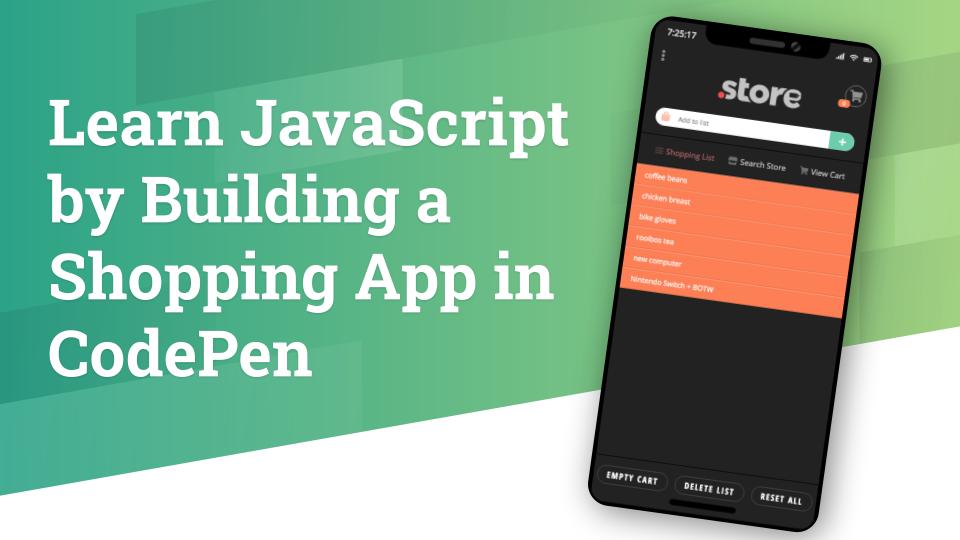
Learn JavaScript by Building a Shopping App in CodePen

Learn by doing! The best way to learn JavaScript is with projects, so we’ll be building a shopping app in CodePen.

In this tutorial, we’ll learn how JavaScript can manipulate data and the DOM to create a multi-screen, dynamic web app, right inside CodePen. We will walk through the app-building process together: from creating app screens in HTML & CSS, to adding basic JavaScript functionality with button presses, to adding basic data processing. This tutorial is aimed at beginner developers.

Lesson Outline

The following is a tutorial that was presented at JS Conf Korea 2019 on September 3, 2019. It is a 4-part tutorial. The first part (Introduction & Overview) is presented here, but the other three parts are part of an online course I’m creating.

  1. Introduction <this part>
  2. Building the Shopping List Screen
  3. Building the Store Screen
  4. Building the Cart Screen

Material required

Introduction

As you may have noticed in my bio, my name is Aaron Snowberger, and I’m a frontend designer/developer who likes to dabble in backend and mobile technologies. My current passions include React, React Native, Node, and the WP REST API. I’m also a Google Certified Trainer who has taught computer science and graphic design in high school since 2013. I’m passionate about helping new learners discover the joys of JavaScript.

The web project this tutorial introduces is for a project that I built with my high school students in the Spring 2019 semester.

My class began the project with a review of HTML structure and CSS styles in order to create the overall look and feel of the web app. But the project’s main focus was to introduce my students to the beauty of JavaScript, and that is what the bulk of the tutorial will cover.

Why JavaScript

There are many reasons why JavaScript is a particularly useful programming language for new learners. Here are just a handful of them:

  1. JS is the third leg of the code-tripod that builds websites. Whereas HTML & CSS are not really programming languages per se (they are markup languages concerned with presentation, not function), JS is actually a functional programming language that can create interactive applications – and not just online brochures.
  2. JS is everywhere. The majority of the world’s websites utilize JavaScript somewhere – it provides much of the interactivity on a site – and it can also be used to build mobile applications (React Native, NativeScript). As such, the majority of the world’s population with access to the Internet is in contact with JavaScript on a daily basis.
  3. JS is noob-friendly and (relatively) easy to learn. Compared with many other true programming languages, JavaScript’s syntax and key concepts are rather straightforward and relatively easy to learn. So much so that middle school and high school students can pick it up, and there are even some block-building languages (like Blockly and Scratch) which are based on JavaScript and taught to even younger students. JavaScript is also one of the easier languages to debug.
  4. JS is also quite powerful. Some of the top websites in the world like Facebook, Instagram, AirBnB, and Netflix utilize JavaScript in their webpages and mobile apps. JavaScript can be used to power either the frontend or the backend of websites, and there are hundreds of very powerful frameworks and libraries of code available to work with.
  5. JS is undoubtedly fun to work with. By its very nature, powering websites and providing their functionality, JavaScript is highly interactive and visual, giving you the ability to build animations, powerful UIs, games, and apps. Plus, it’s even more fun when you realize you can build something that millions of people around the world can enjoy together.
  6. Learning JS can lead to a bright future. The JavaScript ecosystem is rapidly evolving and has seen much growth and change in recent years. As such, JavaScript skills are in high demand and salaries for skilled JavaScript developers are also high. Additionally, by learning the fundamental concepts all programming languages share (loops, conditionals, functions, classes, and so on), students can more easily pick up skills in additional – or more difficult languages as well.

About the Shopping App Project

AKA “How we’ll build this…”

JavaScript is primarily used to access and modify elements within a website. Therefore, we need to learn JavaScript by coding a project that has multiple moving parts, buttons, and interactive elements. A shopping app provides just such an opportunity.

Project Considerations

Each of the three “screens” in this app will be discussed in more detail below, but here is a quick overview of what we want each screen to do and how.

  1. Shopping List Screen
    • Performs like a To-Do List
    • We click a button to “add” or “remove” an items from the list
    • Type in the input field to “create” a new item (task)
    • Drag an item to the side to “delete” it (animate this)
    • Include Reset buttons to restore the original list to its defaults
    • Also include additional visual feedback (CSS animations) so the user can see what effect their interactions are having on the app
  2. Store Screen
    • This needs to include a collection of data – say at least 20 different items we can Search through and Add to our cart
    • We want to be able to change the View Type (from list to grid and vice versa – CSS Grid is a perfect tool for this)
    • We want to include filters such as Category, Price, and so on
    • We also want the Store to be searchable
    • We need to include some functionality to “Add” items to our cart so that when we click over to the Cart Screen, those items are there
    • We also need some kind of animation or visual feedback for the user (this can be handled with pop-up “Toast” notifications)
  3. Cart Screen
    • The cart will contain “cloned child nodes” from the Store Screen when the user clicked “Add to cart”
    • It needs to be able to dynamically update quantities and prices
    • And we also want to include some kind of nifty Checkout progression or modal and possibly a nice “shipped out” animation

First, some notes on HTML & CSS

  • HTML Structure
    • Use semantic markup (<nav> or <aside> rather than always <div>) & descriptive class names (like "shopping-list-item")
    • This helps you to think in a more modern, modular style when you build the structure (like components) first
  • CSS Style
    • Some useful visual indicators and design tools include:
      • My personal favorite design touch is using a dark bottom-border and light top-border on each list item – to give the appearance of three-dimensions and shadows
      • Transitions for everything are useful
      • Animations & keyframes also allow us to give visual clues to the user by doing things like jiggling the Cart icon when an item is added or removed
      • Additionally, transforms, opacity, and positioning can help us a lot
    • CSS Grid & Flexbox are also particularly useful tools (especially since React Native utilizes flexbox, so it’s good practice here if we want to work with React Native later)

1: Shopping List

Originally, this shopping app was designed to behave primarily like a To-Do list. So, it was more like a shopping list app that incorporated the following:

  1. A pre-built list of items
  2. To which new items can be added (input field)
  3. Items can be clicked on and marked as completed (purchased) with a strikethrough
  4. Or items can be removed from the list altogether (by dragging it off the screen)

After these initial functions were built, it seemed like a good idea to allow users to also do them in bulk, so the following buttons were added:

  1. Empty Cart – systematically goes through the list of items and removes the strikethrough, also returns the cart number to zero
  2. Delete List – systematically (and programmatically) removes each item from the list by “dragging” it off the screen in order
  3. Reset All – systematically resets the list to its original defaults by adding all the items back in

In addition to the functionality listed above, in order to provide adequate visual feedback to the user, CSS transitions, animations, and pseudo-elements were added to make the app appear as though every button click or input was having a (non-simultaneous) effect.

This meant that all the functionality of the app was given a 300-1200ms transition, for adding, deleting and so on. “Purchased” items appear to float up “into” the shopping cart, and bulk actions don’t happen all at once, but sequentially with a short delay between each item.

Shopping List Toolbox

The following is a list of necessary JavaScript knowledge to add to our mental toolbox in order to build the Shopping List screen:

Let’s build the Shopping List Screen!

Checkout the finished product in the CodePen below. Investigate the JS code in the editor to learn how it all works.

Completed Shopping List Screen.

2: Changing Screens

Technically, this is not another screen that we need to code, but rather the ability to seamlessly transition between screens. Therefore, it deserves its own subsection in which to discuss WHAT we want to do and HOW we want to do it.

  • Considerations:
    • Let’s make the screens appear to shift from left to right as we click between them. This means we need to make the width of our app <div> at least as wide as three screens, and then we want to absolutely position it where it needs to be for each visible screen.
    • Additionally, we need to change how the input field works:
      • On the Shopping List Screen, it adds items to our list
      • On the Store Screen, it should search the store
      • On the Cart Screen, it should search the cart
    • And of course, we want to add some Toast notifications (pop-ups) to indicate to the user what is going on

Changing Screens Toolbox

The following is a list of necessary JavaScript knowledge to add to our mental toolbox in order to build the Change Screens transitions and functionality:

  • JavaScript
  • CodePen
    • Additionally useful is being able to Add External CodePens into your next working model with CSS or JS code pre-built. This can help you to separate out different features and keep you CodePen code a little simpler.
    • For example, after building the Shopping List Screen in the previous section, I load its CSS and JS into every other CodePen I create (all the other Screens) to carry over its styles and functions.

Let’s build the Change Screens functionality!

Checkout the finished product in the CodePen below. Investigate the JS code in the editor to learn how it all works.

Completed Change Screens transitions.

3. Store

This is Screen #2 that we will build, the Store. You can see from the screenshot that this screen adds our collection of data (stored in a JavaScript array), a few interactive buttons on the store itself and on each item, and changes the input field to search for items in the store. Let’s run over our considerations for the Store Screen once again:

  • Considerations
    • Collection of data – say at least 20 different items (stored in a JS array)
    • Buttons to change the View Type (from list to grid and vice versa – the grid icon at the upper-right corner of the store is what we’ll use)
    • Filters: Relevance – Lowest Price – Highest Price
    • Search bar: although not instantaneous search, when ENTER is pressed, it returns (and displays) an array of the relevant items as well as a notification for the results it found (and an “x” button to clear the search) – see below
    • When “Add to Cart” is pressed, we need to clone the DOM node and add it to the array of items that are present in our Cart screen (so that when we click over there it will already be in the Cart)

Store Screen Toolbox

The following is a list of necessary JavaScript knowledge to add to our mental toolbox in order to build the Store screen:

Let’s build the Store Screen!

Checkout the finished product in the CodePen below. Investigate the JS code in the editor to learn how it all works.

Completed Store Screen.

4. Cart + Checkout

The third and final Screen we need to code for our app is the Cart Screen which will include a Checkout modal. Each item that we “Added to Cart” in the Store screen appears in our list here (as cloned DOM nodes).

Beneath the Cart list (not pictured) is a “Checkout (3)” button – with the quantity of items to purchase, and a “Total: $” field, both of which are dynamically updated as we add (or remove) items in the Cart.

Above the Cart list, is the Checkout modal progression: REVIEW – PAYMENT – COMPLETE. When we click the “Checkout (3)” button, this should take us through the full payment process to a “shipped out” animation at the end.

  • Considerations
    • Cloned child nodes are absolutely necessary to make the app function seamlessly between Store and Cart screens. This is because we are not actually loading different screens and passing data between them, but instead we continuously remain on the SAME page, and just push a different area into our iPhone screen based on the section of the app we want to load. Therefore, when we “Add to Cart” we actually need to create an identical copy of the DOM node that contains the item and add it to the Cart section.
    • Dynamic updates (in price or quantity) are controlled and managed with JavaScript’s MutationObserver that detects changes in the DOM and can respond accordingly, as well as custom HTML data attributes to retrieve the relevant information we need.
    • The Checkout Modal is a straightforward implementation that requires no special implementation methods.

Cart Screen Toolbox

The following is a list of necessary JavaScript knowledge to add to our mental toolbox in order to build the Cart screen:

  • JavaScript
    • Useful functions
      • .cloneNode() – to copy the DOM node containing our desired item
      • .appendChild() – to add the cloned node to the Cart
      • MutationObserver – to listen for changes in the DOM
        • This JavaScript feature in particular was the most important thing that I discovered while building the app. There is no other way to listen for changes in the DOM and respond to them without reloading the page.
      • parseFloat() – to deal with updating our prices
      • .toFixed(2) – also for updating prices (limit the decimal to 2 places)
      • .forEach() – to perform the same action on all DOM nodes in an array
  • HTML data attributes – we are using data-item-price

Let’s build the Cart Screen!

Checkout the finished product in the CodePen below. Investigate the JS code in the editor to learn how it all works.

Completed Shopping List Screen.

Just Keep Learning

I hope you found this tutorial session informative and interesting! And I encourage you to always “Just Keep Learning” and experimenting, building new projects, and trying things out. Below is a list of helpful resources you might find useful in your journey.

Resources

View the FULL CodePen Collection (including Start and End points for every screen) here:

Personalize VS Code

I’ve really been enjoying VS Code for development these days. Here are some of the things I’ve done to customize my new favorite code editor.

While I’ve used (and enjoyed) a number of different coding environments and IDEs in the past (NetBeans, Atom, Brackets, Notepad++), these days, I’m really enjoying VS Code. The following is a list of what I’ve done to customize my WordPress development environment.

1. Customizing Visual Studio Code

Extensions (CTRL + SHIFT + X)

  1. Beautify
  2. Debugger for Chrome
  3. EditorConfig
  4. ES6 String HTML
  5. ESLint
  6. Express
  7. GitLens
  8. HTML CSS Support
  9. IntelliSense for CSS
  10. Live Server
  11. Markdown All in One
  12. PHP Debug
  13. PHP DocBlocker
  14. PHP IntelliSense
  15. PHP Server
  16. PHP Code Sniffer
  17. Prettier – Code formatter
  18. REST Client
  19. Sass
  20. Settings Sync (special note: Use this Extension to sync your Settings across multiple machines once you’ve got things the way you like)
  21. SVN
  22. Terminal

Snippets

  1. HTML Snippets
  2. JavaScript (ES6) code snippets
  3. jQuery code snippets
  4. React-Native/React/Redux snippets for ES6/ES7 Standard

Themes

  1. Atom One Dark Theme
  2. Fresh Material
  3. Material Icon Theme
  4. Material Theme
  5. Palenight Theme
  6. One Dark Pro
  7. One Monokai Theme
  8. VS Code Icons

Settings (CTRL + Comma)

Most of these Settings can be found and edited within the Settings interface of VS Code. But to do workbench.colorCustomizations, you’ll need to edit the JSON of your settings. So, it’s easiest to simply Search for that in the search bar, then copy-paste the following into the JSON Settings.

{ 
"editor.fontFamily": "'Noto Mono', 'Fira Code', Hack",
"editor.fontSize": 16,
"editor.fontLigatures": true,
"editor.formatOnPaste": true,
"editor.tabSize": 2,
"workbench.iconTheme": "material-icon-theme",
"files.autoSave": "onWindowChange",
"workbench.colorTheme": "Palenight Italic",
"workbench.colorCustomizations": {
"terminal.background": "#1F2330",
"activityBar.background": "#7e57c2"
},
}

Fonts

My preferred Settings above require some additional fonts. Here they are:

  1. Fira Code
  2. Noto Mono
  3. Hack

Resources

For more tips on using VS Code, check out the following video lessons.

  1. VS Code Power User by Ahmad Awais
  2. Learning Visual Studio Code by Reynald Adolphe on LinkedIn
  3. Visual Studio Code for Web Developers by Joe Marini on LinkedIn

Move WordPress media uploads to a subdomain

I recently decided to move my WordPress media uploads to a subdomain to improve site speed and help keep things organized for better backups. These are the things I did and issues I ran into along the way.

I recently updated my personal homepage, and decided to collect all my writing about code from three other sites that I’d worked on over the years. So, I exported the Posts from each of those sites, and imported the .xml files to my new site in order to shift the Posts to my new homepage. Along the way, I decided to move my new site’s media uploads folder to a subdomain, and I ran into a few problems along the way.

Why move media to a subdomain

There are a couple of reasons for this:

  1. To speed up my site by allowing simultaneous downloads from multiple sources at once (almost acting like a mock CDN)
  2. To keep things organized and make taking site backups easier (by backing up the database and files separately)
  3. To do a “dry run” on a small site before attempting the same thing on a large site I run (400+ Posts)

How to move media to a subdomain

  1. Create the subdomain on your host files.sitename.com for example
  2. Download ALL the old media files from your WordPress /wp-content/uploads folder via FTP
  3. Upload ALL the media files to your new subdomain
  4. Change your Upload folder to the subdomain in your WordPress settings

You may need to type /wp-admin/options.php in the URL bar and scroll down to upload_path and upload_url_path as this menu option is not visible in the WordPress menu.

  • upload_path : directory root for subdomain
    • set it to /home/server_root/sitename/folder
    • Echo the following from an index.php file at the site root to find your directory root path: <?php echo $_SERVER["DOCUMENT_ROOT"]; ?>
    • Mine is /home/server_root/sitename/media
  • upload_url_path : actual URL path for the subdomain
    • Mine is https://files.sitename.com/media

After changing those options, you should see them appear now in the WordPress Settings → Media menu.

  1. Change your Live Image URLs with a database Search & Replace plugin (this is easier than phpMyAdmin). Two good options are:
    1. Search & Replace by Inpsyde GmbH
    2. Better Search Replace by Delicious Brains

(I actually prefer the first one because it seems to run faster (there is no loading bar at the bottom of the screen) and also includes the option to download an SQL backup of your database from the first screen in the plugin – and then import it again if your search/replace fails or causes problems.)

  • Search: http://www.oldsitename.com/uploads
  • Replace: http://subdomain.sitename.com/media

Double check everything is working by trying to upload a new image, and checking your old Posts that had loaded the older images (open a different page or empty the page cache first).

  1. Redirect images that are already indexed by search engines. Do this by adding the following to your .htaccessfile:
RedirectMatch 301 ^/wp-content/uploads/(.*)$ http://img.yoursite.com/$1
  1. Finally, it might be a good idea to create a homepage for the subdomain that directs visitors back to your main site or allows them to search it (otherwise they’ll be met with either a blank page or a 403 Access Forbidden error). Here’s a good article that provides more details, and an example.

Problems I ran into

  1. I have a number of Galleries on my old WordPress Posts, but the way the gallery references images is not with an image URL, but with the gallery shortcode. It looks like this:
[ gallery type="rectangular" link="none" size="medium" ids="31183,31184" ]

So, actually, even when I imported my old Posts to the new site, I didn’t get any of the old galleries showing up because the media IDs which are referenced in the gallery shortcode seem to not be the same on the new site – even if I click “Download and import file attachments.”

  1. When I checked the image code on the old site, it also looked like some of what the site was serving up were some kind of “responsive images.”

One of the themes I wrote before did add support for responsive images, so it seems like those are being served up a bit differently than “normal” images. For example, the URL of some of those images included https://io.wp or something similar – as if being loaded through a default WordPress CDN.

  1. Even after updating and changing everything, the images on my subdomain did not show up inside my Media Library.

Resources

Welcome to WP-CLI!

I have limited experience with wp-cli but I know it’s a really quick and convenient way to manage WordPress installations. And recently I’ve been using ssh to to manage my sites more often, so I thought it would be a good time to investigate it more deeply.

I’m hosting this site on Dreamhost.com (my host since 2009), and I recently went through their One-Click install to quickly add WordPress here. But, strange thing is, I didn’t receive an email from them with my username/password combination – so I had no way to login (at first). 

After a quick Google search, I noticed that Dreamhost has a page about resetting your password – including a section on using wp-cli

I have limited experience with wp-cli but I know it’s a really quick and convenient way to manage WordPress installations. And recently I’ve been using ssh to to manage my sites more often, so I thought it would be a good time to investigate it more deeply.

Here’s a list of the very first commands I’m running on my new WP install – as well as some I intend to put to greater use in the future.

Login

First of all, we need to ssh into the server and access the site.

$ ssh username@site.com
$ cd site.com/wordpress

Change user password

$ wp user list
+----+-------------+---------------+------------------+---------------------+---------------+
| ID | user_login | display_name | user_email | user_registered | roles |
+----+-------------+---------------+------------------+---------------------+---------------+
| 1 | myusername | myusername | user@example.com | 2018-03-17 11:14:28 | administrator |
+----+-------------+---------------+------------------+---------------------+---------------+
$ wp user update 1 --user_pass=NewerBetterStrongerPassword123$
Success: Updated user 1

Create an alias to check for updates

One of the coolest things I found was that you can create an alias to run a series of wp-cli commands one after the other. The following command will check for WP core, plugin, and theme updates at once.

$ alias check-all='wp core check-update && wp plugin list --update=available && wp theme list --update-available'
$ check-all
Success: WordPress is at the latest version.
+------+--------+--------+---------+
| name | status | update | version |
+------+--------+--------+---------+
+------+--------+--------+---------+
+-----------------+----------+--------+---------+
| name | status | update | version |
+-----------------+----------+--------+---------+
| twentyfifteen | inactive | none | 2.0 |
| twentyseventeen | active | none | 1.7 |
| twentysixteen | inactive | none | 1.5 |
+-----------------+----------+--------+---------+

Update and manage core, plugins, & themes

While I could probably create another alias to update everything at once, I haven’t yet because I still like to do some things step-by-step. So, here are the three commands needed to update or manage WP core, plugins, and themes:

$ wp core update
$ wp core update --version=4.7.1

$ wp plugin update --all
$ wp plugin status
$ wp plugin install plugin-name
$ wp plugin activate plugin-name
$ wp plugin deactivate plugin-name
$ wp plugin delete plugin-name

$ wp theme update --all
$ wp theme status theme-name
$ wp theme install theme-name --activate

Many of the plugin and theme commands are quite similar and you can do certain things like stringing together some of them (wp theme install theme-name --activate).

Check your config file or databases

A couple more useful commands are to check out your wp-config file’s constants and globals, and work with your database:

$ wp config get

$ wp db size --tables
$ wp db optimize
$ wp db repair
$ wp db export filename.sql

Clean up post revisions

Sometimes you just need to clean up your post revisions, especially if your site is old or has loads of them. But first, you’ll need to install an additional wp-cli package.

$ wp package install trepmal/wp-revisions-cli
$ wp revisions clean

Or, for specific posts and/or dates:

$ wp revisions list --post_id=ID
$ wp revisions clean --post_id=ID --before-date="YYYY-MM-DD"

Remove all spam comments

This one looks to be a great help, especially for big installations that get a lot of spam. But there are quite a few other commands to help manage comments.

$ wp comment delete $(wp comment list --status=spam --format=ids)

Resources

WP Migrate DB Manually : Multisites & Single Sites

Recently, I needed to migrate a WordPress site from a Multisite installation to a Single Site .com.

I usually use the WP Migrate DB plugin because it works well for my basic needs, but going through the Multisite -> Single Site transition very manually, sure made me see the value in the Pro version of their plugin.

For a full video tutorial walkthrough of the transfer process, I highly recommend Morten Rand-Hendricksen’s Lynda.com course on the subject. Below are a few step-by-step notes detailing the process.

Setting things up

  1. Setup your <TARGET> site first
    1. Install WordPress with default options
  2. Migrate plugins, themes, and uploads
    1. Move them from the <ORIGIN> site -> the <TARGET> site *
    2. Using FTP, I download what I want to keep to my Desktop
    3. Then, upload them back to the NEW site (watch a video, it’ll take a while)
  3. Install WP Migrate DB on both sites and open it

migrate_db

Single Site -> Single Site

  1. From the <TARGET> site:
    1. Copy the URL -> <ORIGIN> site’s “New URL”
    2. Copy the file path -> <ORIGIN> site’s “New file path”
  2. On the <ORIGIN> site:
    1. Export the SQL file
  3. Prepare <TARGET> site’s wp-config.php file **
    1. Open <ORIGIN> site’s wp-config.php file
    2. Find $table_prefix down in the file and copy that table prefix String
    3. Replace $table_prefix String in the <TARGET> site’s wp-config.php with the <ORIGIN> site’s String
    4. Save the modified <TARGET> site’s wp-config.php
  4. Open phpadmin on the <TARGET> site
    1. Drop all <TARGET> site’s default wp_ tables
    2. Import <ORIGIN> site’s SQL file (from WP Migrate DB)

Multisite -> Single Site

I did all the previous steps for the Multisite configuration (to test it), but ended up with the default site and not any of the Posts or content I needed in my subsite. Luckily, DeliciousBrains has written up a tutorial detailing this kind of migration as well:

Extracting a Subsite from Multisite to Create a New Single Site Install

These are the steps I followed (and some notes about mistakes I made):


Notes:

* Originally, when you want to move your uploads folder from Multisite to a single site, you’ll notice another folder in the uploads folder:

  • /uploads/sites/4/2016/
    • The sites folder contains all the uploads for each subsite
    • The 4 (or other numbered folder) is the site ID (you can find the site ID by going to that particular site’s admin Page)
      • http://sitename.com/wp-admin/network -> Sites -> Subsite name
      • http://sitename.com/wp-admin/network/site-info.php?id=4
  • So, you move the content from the site ID’s folder to your <TARGET> site’s uploads folder
    • /uploads/sites/4/2016/ -> /uploads/2016/

** This also means that your $table_prefix String in wp-config.php will include this site ID between the wp_ and the rest of the String:

  • Ex: $table_prefix = 'wp_ex54gTv'; will be 'wp_4_ex54gTv' in the SQL database for your particular subsite

1. Prepare the SQL Export

  1. Migrate plugins, themes, and uploads
    1. Move them from the <ORIGIN> site -> the <TARGET> site *
  2. Replace URL and file path from the <TARGET> site:
    1. Copy the URL -> <ORIGIN> site’s “New URL”
    2. Copy the file path -> <ORIGIN> site’s “New file path”
    3. Click “Add Row” to add subsite details
    4. //subsite.sitename.com -> //newsite.com
    5. Click “Add Row” to replace your uploads folder Strings
    6. /uploads/sites/4/ -> /uploads/

migrate_db_subsite

Now, you’re ready to Export the file.

DeliciousBrains says:

  1. Expand the “tables” section and select the “Migrate only selected tables below” option.
  2. Select all the relevant subsite tables as well as the “users” and “usermeta” tables.

However, that wasn’t an option for me while using the free version of the plugin. Therefore, ALL the next steps were very manual. But, I think the image from their website is helpful to know which tables to keep and which to get rid of in your SQL file:

Source: DeliciousBrains.com

Basically, you will want to KEEP all the WordPress data for your subsite (everything with the site ID between underscores _4_ and DELETE all the WordPress data for the main site.


Notes:

* This was one of my problems going through. I didn’t DELETE all the main site data from the SQL file, so it would import the subsite data, then overwrite it with the main site data.


2. Prepare the SQL upload

  1. After preparing everything as described previously, Export the SQL file
    1. I turned OFF Gzip so I could immediately modify the file after download
  2. Modify the .sql file in any code or text editor
    1. Go ahead and go through and DELETE all the SQL tables that we didn’t need to select (everything that ISN’T blue in the image above).
    2. These will be listed in the alphabetical order shown in the image, so should be easy to find. DELETE everything from wp_blog_versions to wp_terms (because you’ll notice you still have wp_4_terms and the like that contains your subsite data
    3. Find and Replace any instances of wp_4_ with just wp_
    4. Save and close the file
  3. Open phpadmin on the <TARGET> site
    1. Drop all <TARGET> site’s default wp_ tables
    2. Import the NEW SQL file (you just modified)
  4. Run cleanup
    1. DeliciousBrains has some SQL queries you can run to remove duplicate usermeta rows as well – these didn’t work for me as the syntax in my phpadmin was wrong, so I manually deleted old users, etc.
    2. Alternatively, it looks like this SQL script will do the job as well

Problems?

  1. Whitescreen of Death? Your theme may be missing from the target site – /wp-admin will still work – choose a different theme, or be sure to upload the one you want
  2. Manual DB import fails? Don’t use GZIP and export it again (larger file size)
  3. WP Migrate DB ate my posts? This is a migration, not merge – use WP Migrate DB Pro’s push/pull if you just want “updates”
  4. Media files not working? Be sure everything is uploaded (and for Multisite, be sure you changed the upload folder during your SQL export – from /uploads/sites/4/ to /uploads/
  5. Migration failed? Be sure the $table_prefix Strings in your <TARGET> site wp-config.php match those in the <ORIGIN> site’s wp_config.php

Was this helpful?

I hope this write-up was helpful. Let me know in the Comments. I plan to use these notes for my next Migration as well.

Side note: WP Migrate DB Pro can do all of this FOR you automagically. It can also UPDATE your site if there is newer content on one side or the other using their push/pull function. It would be a great option if you do lots of migrations or just want to save yourself the headache of doing it all manually.

HTML Aside: Finding and Using Internet Images

There are TWO primary concerns when searching for images on the Internet to use on a webpage:

  1. WHERE will I find good images?
  2. What about image COPYRIGHT?

This article covers the basics of both topics – but let’s begin with COPYRIGHT.

Copyright

There are TWO basic forms of copyright to be aware of:

  1. Implicit / inherent (unspecified) copyright
  2. Explicit (specified) copyright

Implicit (default) copyright

Generally speaking, EVERY image you find online was shot or created by someone besides yourself – which means it automatically, inherently possesses a copyright by the original creator. You are not (legally) permitted to simply “search and use” any image you find on Google.

Explicit copyright

Many content creators explicitly assign different forms of copyright to their creative works.

SIX copyright terms you may have heard:

  1. “All rights reserved” (exclusive rights)
    • Copyright DEFAULTnothing may be done with a copyrighted work without permission
  2. Royalty free
    • Buy the license once, use the image multiple times without paying additional royalties for each use
  3. Stock photos
    • Images licensed for specific uses (or a specific number of uses) – often lower priced
  4. Fair use
    • Copying a copyrighted image in a “limited and transformative” way
    • Fair uses in the US: commentary, search engines, criticism, parody, news, research, scholarship
    • This is often the most misunderstood and misused defense when using a copyrighted work – and people have been sued for it
    • Better to avoid the trouble altogether, or have a good Fair Use Checklist (and lawyer)
  5. Creative Commons
    • Copyright holders specify which rights they reserve and which they waive – often providing images for free use within limits (primarily attribution)
    • CC0 Images (Creative Commons 0 license) are dedicated to “public domain” use
  6. Public Domain
    • Images (and books, music, or other copyrighted material) that may have once been copyrighted, but are now considered “owned by the public” due to the expiration or forfeiture of exclusive rights
    • The Unlicense is also a “Public Domain Dedication” license

Tips:

  1. Do you want FREE images?
    1. Use images in the public domain or with CC0 or Unlicense licenses
    2. Use images with Creative Commons licenses and credit the author (or whatever else the specific type of CC license requires)
    3. Take / create your own images
  2. Do you have $$$ and want to use a single image all over the place?
    1. Purchase a royalty free image
  3. Do you have $$$ and just need an image for a specific use?
    1. Purchase a stock photo

Where to Find Good Images

The following is a brief list of some of my personal favorite Image finding websites. The complete list of Image finding websites will live on at justkeeplearning.xyz/find-images.

  1. CC0 Sites (FREE use – but check anyway)
    1. Finda.photo
    2. Pexels.com
    3. Pixabay.com
    4. Gratisography.com
  2. Creative Commons (check the license, terms, usage allowance)
    1. Wikimedia Commons
    2. Google Image Search (Tools = Reuse allowed)
    3. Flickr.com (Advanced Search = All Creative Commons)
    4. Stock Xhange
  3. Stock Photo Sites (buy a license, understand terms)
    1. Shutterstock.com
    2. Getty Images
    3. DepositPhotos.com
    4. 123rf.com

HOW to Select Excellent Images

Now that you know WHERE to look, it’s equally important to know how to choose high quality images. The following is a (mental) checklist I use:

  • I: Information – Does this image add information and/or enhance the content?
  • M: Mood – Does this image convey the right mood? Does it fix the context?
  • A: Authentic – Does it look fake, posed, or unnatural? Avoid it. Find something authentic.
  • G: Great shot – Is it visually striking, crisp, well-lit, well-cropped, and high quality?
  • E: Engaging – Does this image engage your audience? Does it grab attention?
  • S: Smart Style – Does this image fit with your website/brand’s style and color scheme?

For more information on selecting Excellent Images, check the following two links:

  1. 4 Tips for Choosing the Right Stock Photography
  2. Choosing Images for Your Website – The Minimalist Guide

HTML Learning Course

  1. Introduction to HTML
    1. Aside: Creating HTML Files
  2. Webpage Structure
  3. Text Elements
    1. Aside: Character Codes
  4. Lists
  5. Links
  6. Images
    1. Aside: Finding and Using Internet Images
  7. Tables
  8. Forms
  9. Additional HTML tags

A Roadmap for WordPress as LMS

This talk attempts to give real, practical tips – and a roadmap – for developing a Learning Management System for your classroom with WordPress.

This talk was presented at the KOTESOL National Conference in Seoul on May 30, 2015. With this presentation, I tried to reduce the amount of theory (from my last LMS talk) and increase the amount of practical application steps that teachers could use to begin creating their own LMS websites with WordPress.

This slideshow is accompanied by my own “WordPress as LMS Roadmap” paper that gives step-by-step advice and instructions for building a (basic) WordPress LMS.

Although in the talk, I highlighted the major selling points for using WordPress as an LMS, I’ll refer you to my previous LMS talk titled “WordPress as LMS (Learning Management System)” for more information on WHY you might choose WordPress over the other available options. For the remainder of this post, however, I’ll focus on the practical steps involved in building your own class website in WordPress.

The Roadmap

Review: The 6 Things an LMS Needs to Do

6-aspects

  1. Communicate Objects (Courses, Lessons, Modules)
  2. Show Learning Timelines (Syllabus)
  3. Deliver Content (Dripped content = content that is only accessible at specified times)
  4. Assess & Track Student Progress (Quizzes, Tests, Attendance, Participation, Gradebook)
  5. Communicate with Students (Comments, Forums, Wikis, Chat)
  6. Provide Ongoing Resources (in some sort of library or collection)

Step 0: Get a website

You basically have 2 options: FREE or PAID and both have their upsides and downsides:

  1. FREE Advantages and Disadvantages
    1. (+) It’s FREE
    2. (-) Themes, plugins, and design options are limited. Plus, your URL will be either yourclass.wordpress.com or yourclass.edublogs.org – you won’t own your own .com
  2. PAID Advantages and Disadvantages
    1. (+) You can choose what to pay for and how much you’re willing to spend. You can buy your own yourclass.com URL, and can basically make any theme, plugin, and design choices you want
    2. (-) You pay for it. Some highly specialized themes, plugins, or features are sold separately

If you want a completely FREE site, you can still build a very functional classroom website in WordPress. I used a totally FREE installation of WordPress for the first 2 years of my LMS.

The remainder of this post will focus on creating a FREE WordPress LMS, although I will highlight some of the paid options you may wish to consider.

FREE Hosting Options

  1. Go to http://www.wordpress.com and sign up for a FREE account (you can upgrade later)
  2. Go to http://www.edublogs.org and sign up for a FREE account (you can upgrade later)

PAID Hosting Options

I’ve used Dreamhost.com since 2009 and have hosted dozens of personal and client websites there. You can manage every aspect of web hosting from there including:

  1. Setup Step 1: Buying your URL Domain name
  2. Setup Step 2: Installing WordPress with a One-Click Installer
  3. Setup Step 3: Setting up email inboxes @yourclass.com
  4. Support: Dreamhost also has a large Wiki for support for its services and
  5. Support: They have a very helpful support staff and are active on Twitter

If you want to go with Dreamhost, I can offer 2 months of FREE hosting on a year plan if you sign up with this link AND enter the code WPMUJJ as a discount code when you sign up.


Step 1: Communicate Objects (Posts)

After getting setup with a WordPress website and logging into the backend, you have the option to customize your Theme (design), add Plugins (extra functionality), or play with any of your other Settings. It’s probably a good idea to at least familiarize yourself with the WordPress backend menu.

Additionally, you should get to know “The First FIVE Components of WordPress to Understand When You’re Just Starting Out” (click link to view the full description of each). In brief, they are:

5-key-concepts

  1. Pages
  2. Posts
  3. Categories
  4. Tags
  5. Media

In your LMS class site, you can use each like this:

  1. Pages = semester-long use (static) – use for Class homepages, Syllabus pages, About pages, Resource pages
  2. Posts = daily use (chronological) – use for Class lessons, Homework assignments, or Reviews
  3. Categories = folders – assign each Class a separate folder to store all Class materials within it
  4. Tags = keywords – tag Posts with grammar points, topics, or subject content to allow easy searching and linking of related Posts later
  5. Media = upload your PPTs, PDFs, DOCs, Images, Videos, or other content here – and don’t forget that WordPress also does a GREAT job of supporting native embeds from sites like Twitter and YouTube. Click this link for a complete list of all the filetypes and embeds WordPress supports

Step-by-Step

  1. Gather your teaching materials and content
  2. Create a NEW Post for every Lesson
  3. Type (or copy-paste) your Lesson into the Editor and give it a Title
  4. Upload class materials and media
  5. Assign a Category using the Name of the Class (Freshmen Conversation 1B, for example)
  6. Add Tags based on the subject matter (be verb, introductions, conjugation rules, etc)
  7. Schedule the Post (if you want it to be available later, not immediately)
  8. Publish the Post

Plugins that may be helpful

1-commobjs

  1. Easy Classes
  2. WP Teacher
  3. WP Course Manager (like a course catalog)
  4. EduHack (creates a course catalog showing relationships between courses and prerequisites)
  5. Educator (LMS)
  6. CoursePress (LMS)

Step 2: Learning Timelines (Pages)

After publishing a handful of Posts/Lessons (or possibly before), you may want to create a Class PAGE specifically for containing the Syllabus, Lesson Plans, and Links to those Lessons. The best way to do this is to create a WordPress Page.

Pages are unique in WordPress in that they DO NOT have Categories nor Tags. However, they are hierarchical, so you could create a Freshmen Conversation Page that has multiple “children” like the list below indicates:

  1. Freshmen Conversation
    1. Freshmen Conversation 1A
    2. Freshmen Conversation 1B
    3. Freshmen Tues/Thurs
    4. Freshmen Student Center Class

If you use “Pretty Permalinks” (go to Settings -> Permalinks in the WordPress sidebar menu) URLs of each Page will follow after their “parent” Page like so:

  1. myclass.com/freshmen-conversation/
    1. myclass.com/freshmen-conversation/freshmen-conversation-1a/
    2. myclass.com/freshmen-conversation/freshmen-conversation-1b/
    3. myclass.com/freshmen-conversation/freshmen-tues-thurs/
    4. myclass.com/freshmen-conversation/freshmen-student-center-class/

Therefore, you could simplify your Class Page names under the “parent” Page to only include the section number, date, or location of the class if you want (of course, you could also modify the URL by changing the “slug” under the Title of any Page as well).

Step-by-Step

  1. Create a Page for each Class
  2. Optionally create one “Category” main Page and Sub-Pages for each Class under that
  3. Copy-paste in your syllabus OR type it up in an unordered list OR table (using a plugin)
  4. Link each Post/Lesson from your Class Category to its syllabus item
  5. OR simply link the entire Class Category to the top of the Page (when students click the main link, it’ll take them to the Category Page which will show a chronological listing of each Post in their Class from most recent to latest)

Plugins that may be helpful

2-timelines

  1. Easy Table (can be used directly in the Post/Page Editor with the syntax required)
  2. TablePress (has its own interface, slightly more complicated and versatile)
  3. Websimon Tables (similar to TablePress with its own interface)
  4. The Events Calendar
  5. Weekly Class Schedule
  6. My Calendar
  7. Booking Calendar (allow students to schedule a meeting with you through your site)
  8. Online Lesson Booking (schedule a 1:1 lesson or meeting)

Step 3: Deliver Content (Scheduled Posts)

“Drip Content” is a term that means “sequential delivery of content.” This basically means that students don’t (or should not) have access to later Lessons before they complete (or are taught) previous Lessons.

This is very useful in fully automated online Learning Management Systems where a course creator simply sets up the system that unlocks later Lessons as users progress through and complete the Lessons in order. There are a number of good plugins to help you accomplish this.

However, for a simpler system – and one in which the teacher is a more active participant as the course progresses, the simplest method for “dripped content” is simply creating and Scheduling each Lesson/Post for the date that Lesson is to be taught or made accessible (this is akin to simply writing a new Lesson and Publishing it every Monday, for example).

Step-by-Step

  1. Write a Post (Lesson) for you Class
  2. Assign it a Category (Class folder) and add Tags (topics / keywords)
  3. Change the “Publish On” date in the Publish Meta Box
  4. “Schedule” your Post

Plugins that may be helpful

3-delivery

  1. Show/Hide Content at Set Time
  2. Timed Content
  3. Table of Contents Plus
  4. Simple Course Creator
  5. Simple Course Creator – Updates (shows updated course content in a timeline)
  6. WP-Members
  7. Search the Plugin Directory for “Drip Content” or “Show Hide Content”

Step 4: Assess & Track Students (Comments / Authors)

There are numerous ways you can track and assess student work in WordPress. Two of the easiest you can set up with no additional plugins are:

  1. WordPress Comments on Class Posts
  2. Giving students a username and login as an “Author” on your Class site where they can write their own Posts (as essays) which you then edit and approve before they go “Live” on the site

Step-by-Step

Add Authors

  1. Register new Users on your site by going to the Users -> Add New menu item
  2. Assign student roles as “Author” and register them
    1. In recent versions of WordPress, self-registration seems to be disabled, although there are some plugins available that will allow students to register themselves (see below)
  3. Allow students to login and write essays (Posts) in their Class Category – under a Sub-Category of your choice
  4. Edit their work and Publish it – you can write comments in the Post itself or in a Comment below it
    1. Optionally, don’t Edit the Post yourself, but just leave Comments and assign the student the work of coming back in and fixing their mistakes

Take Comments

  1. Go in to the Settings -> Discussion menu to adjust Comment settings appropriately
    1. “Allow people to post comments on new articles”
    2. “Comment author must fill out name and email”
    3. “Comment author must have a previously approved comment”
  2.  Assign students the homework of reading a Class Post and Commenting on it
    1. Additionally, when I was in grad school, I was assigned not only my original Comment about the article, but 3 “Reply” Comments to other students in the class. This is a good way to get a Discussion going.

Grading Student Work

Personally, without installing any additional plugins into WordPress, I have previously just kept records of student work in Excel spreadsheets or Google Sheets (they’re better for calculating numbers on the fly). However, there are a number of plugins available for grading, quizzes, and other things that you may want to try (see below).

Plugins that may be helpful

4-assessntrack

  1. Add Multiple Users
  2. AN_Gradebook
  3. Grading System Daxxip (VERY simple – just assign a grade and make it visible on a Post)
  4. Watu Quiz Tool
  5. Quiz Tool Lite
  6. Easy Quiz Player
  7. Exam Matrix
  8. BadgeOS (Give badges for achievements)

Step 5: Communicate with Students (Comments / Plugins)

One thing that WordPress makes exceptionally easy is communication between people. Whether this is using a Commenting system (as discussed above) or Plugins that add extra Social Networking style features, WordPress is has many powerful tools available to customize communication.

Step-by-Step

  1. Enable Comments on your site (discussed above)
  2. Add Plugins that enhance both your Comments and other forms of communication
    1. Enhance your Comments
    2. Add a Contact form
    3. Add Polls or Surveys
    4. Add Forums, Wikis, or Chats
    5. Add a Social Network plugin

Plugins that may be helpful

5-commwstds

  1. Akismet (the #1 spam comment blocking plugin in the world)
  2. Disqus (enhanced Comments)
  3. Contact Form 7 (one of the most popular contact form plugins in the world)
  4. PollDaddy (available on WordPress.com already)
  5. Polls by OpinionStage
  6. WP Survey and Quiz Tool
  7. Survey by POWr
  8. Wiki by WPMU Dev
  9. Chat by WPMU Dev
  10. Pure Chat – Free Live Chat Plugin
  11. iFlyChat – WordPress Chat (allow users to discuss in public and private chat rooms)
  12. bbPress (Official WordPress forum plugin)
  13. BuddyPress (Official WordPress Social Network building plugin)
  14. BuddyPress Docs (add collaborative work spaces to BuddyPress)
  15. BadgeOS Community Add-on (add badges to bbPress and BuddyPress)
  16. BadgeOS Invite Codes Add-on (allow users on BuddyPress to join specified groups with an Invite code)

Step 6: Ongoing Resources

Finally, it is important to keep an organized space for resources and references for your classes. The easiest way to do this is to create a dedicated Resources Page that you continually update as new resources are found or added.

Your WordPress Media Library houses everything you upload to your site (in chronological order) so it can get rather messy after a while. However, there are a few ways you can help yourself keep things organized in the Media Library:

  1. Be sure to NAME your resources appropriately so that they are easy to Search for in the Search box
  2. Install a plugin to help with organization (see below)

Another option for creating a list of Resources that are simply links to various other locations online is to create a Blogroll (list of other blogs) on a page or in a Sidebar Widget.

Step-by-Step

  1. Appropriately name/label every file you upload
  2. Create a Page called “Class Resources”
    1. You might also create Sub-Pages for each Class like “Freshman 1A Resources”
    2. OR if there will be much overlap, simply divide your Main Page with different Headings for each class
  3. Update your “Class Resources” Page as you find/upload new material
  4. Create a Custom Menu called “Blogroll” or “External Resources” or something
    1. Add links to external sites in this Menu
    2. Add the Menu to a Sidebar Widget (or possibly a Page – you might need a plugin)
  5. Add a Plugin to help you manage everything

Plugins that may be helpful

6-resources

  1. Enhanced Media Library (allows you to Tag your Media Library files and categorize them)
  2. Media Library Assistant
  3. Eazy Enable Blogroll (brings back the original WordPress default Blogroll)
  4. Open Link (outputs Blogroll links to a Page or Post using a shortcode)
  5. Encyclopedia / Glossary / Wiki
  6. Wiki by WPMU Dev
  7. Xili-Dictionary (Multilingual dictionary)
  8. Google Drive WP Media
  9. Google Drive Embedder
  10. BackWPup Free – WordPress Backup Plugin (backups are important)

Full Fledged Learning Management Systems

lms-options

  1. LePress (lacking documentation and screenshots)
  2. Educator
  3. Namaste! LMS
  4. CoursePress | PRO Version
  5. LearnDash (Premium)
  6. WooSensei (Premium)
  7. WP Courseware (Premium)
  8. LifterLMS (Premium)

Your Turn

  • Have you ever built a WordPress LMS site? How was your experience? Any more recommendations?
  • For first users, was my walkthrough helpful? Anything unclear?

Leave me a Comment below.

The First FIVE Components of WordPress to Understand When You’re Just Starting Out

The following article is an excerpt from a presentation I gave on WordPress as LMS that I felt deserved its own Post. Enjoy!~

In WordPress, you only need to understand (a minimum of) 5 KEY CONCEPTS to be able to effectively use the software. They are:

  1. Pages
  2. Posts
  3. Categories
  4. Tags
  5. Media

1. Pages

pages

Pages are hierarchical, “stand alone” articles on your site. Though they have publication dates (and can be scheduled for automatic future publication), they do not “flow” as a blog would. Pages are not inherently “related” to each other and they ARE NOT categorized by Categories nor Tags (more later).

If you want a Page to have some kind of relation to another Page, you must assign it a “Parent” in the Page Attributes widget in the Page editor (red box).

Pages will therefore act like individual menu items (they will be automatically added to your main menu if you don’t create one manually) – and “Parent” Pages will act as the top-level dropdown menu containing any “Child” Pages beneath them.

Pages may also utilize “templates”. These will give your Pages a different output on the front of the website and may look like any of the following:

  1. Home page
  2. Landing page
  3. Contact page
  4. Clients page
  5. About page
  6. Full-Width page
  7. And so on

2. Posts

posts

Posts are chronological (non-hierarchical) articles that “flow” along the Blog page, Home page, or Archive pages as they are written and published.

Posts are grouped together by Categories (that act like “buckets” or Folders), and Tags (keywords that are used to Search the site).

Posts may also utilize “Formats” that style certain Post types differently. For example, you may have different styles for:

  1. Regular (Standard) Posts
  2. Aside Posts (without a title visible on the Blog archive Page)
  3. Image Posts
  4. Video Posts
  5. Quotation Posts
  6. Link Posts
  7. Gallery Posts
  8. Status Update Posts
  9. Audio Posts
  10. Chat Posts

3. Categories

categories

On the front-end of a site, Categories may be visible as Folder names for Month or Topic, or in the Breadcrumbs (the “You Are Here” collection of links at the top of a Post), or as individual Menu items.

(On the front-end, you won’t really be able to SEE the difference between Categories and Pages as they appear in the menu unless you click on the link. If it’s a Category, there will be a long list of Posts; if it’s a Page, there will be only ONE Page.)

With Categories, I usually assign each of my Classes at school (or topics) to a separate Category. That way, when the students click on the Category name, they are taken directly to an ongoing blog list of ONLY Posts for their class.

4. Tags

tags

On the front-end of a site, Tags may be visible in a “Tag Cloud” (a collection of frequently used keywords throughout the site), or in the footer meta (a collection of data at the bottom) of a Post. You can also Search for Tags as these are WordPress’s “keywords.”

With Tags, I usually add the keywords for a lesson subject – such as a grammar point we’re studying or the key concepts to understand.

5. Media

WordPress Media is unique in TWO primary ways:

  1. You can Drag-&-Drop media from your Desktop directly into the Post editor window to upload files.
    media-dragdrop
  2. You can Copy-Paste URLs from popular websites like YouTube and Twitter to get immediate, automatic embeds of those videos and tweets (among other things). No more copying over embed codes!
    media-embeds

The WordPress editor also provides you with a view of what your Post will ACTUALLY look like on the front-end even as you type it and before publishing it.

This list of FIVE basic components of WordPress does not even begin to scratch the surface of what is possible, but it should give you a clearer understanding of how WordPress works and what kinds of things you can publish with it.

In upcoming Posts, I’ll delve deeper into both the “PRETTY” and the “POWER” of WordPress with topics on:

  1. Theme Choice
  2. Theme Customizer (pretty)
  3. Top WordPress plugins (power)

Any questions about any of these? Let me know in the Comments below.

WordPress as LMS (Learning Management System)

We are living in the middle of an age of educational and technological revolution. Will you get swept away, left behind, or ride the riptide of edtech into the future? Join me as I look at various successful models of online schools and classrooms, the major components that make up a successful online Learning Management System, and how to create one for yourself using WordPress.

This is a talk I presented at the Jeonju-Jeonbuk KOTESOL Chapter meeting for March 2015.

*Audience Note

I may have addressed this talk (and presented it) to a slightly wrong audience at the time. The meeting was small and contained people who are primarily ESL teachers – who may be familiar with certain web technologies.

However, I designed this talk for an audience who already understand the basic concepts of an LMS (Learning Management System) and want to implement it themselves in their classrooms.

Therefore, this talk is primarily an argument for WHY WordPress is the BEST solution for an LMS – as opposed to other possible solutions (including Moodle) – and introduces some basic concepts about how to put WordPress to work for you as an LMS.

WordPress as LMS

define:LMS/
Learning Management System: A digital learning environment to manage all aspects of the learning process.

In this talk, I will present THREE basic ideas about WordPress as LMS:

  1. WHY? (2 parts)
    1. Why an LMS?
    2. Why WordPress?
  2. HOW? (2 parts)
    1. How does an LMS work and how can we use it?
    2. How can we use WordPress to create an LMS?
  3. WHAT?
    1. What are the specific steps we can take to create an LMS in WordPress?

Step 1A: Why an LMS?

Recall again that an LMS is “a digital learning environment to manage all aspects of the learning process.” The following is a list of 6 basic aspects in the learning process:

6-aspects

  1. Communicate objects (syllabus, course objectives, handouts, etc)
  2. Learning timelines (class schedule)
  3. Delivery of materials (drip content)
  4. Assessment & Tracking of student data
  5. Communication with students
  6. Ongoing Resources

Traditional classrooms usually involve a great deal of printed paperwork and in-class interaction with the teacher.

On the other hand, LMS-assisted classrooms may help reduce (or entirely eliminate) papers and increase student-to-student interaction both in and out of class.

Another reason LMS-assisted classrooms are beneficial for teachers:

No more lost USBs.

I personally haven’t carried a USB in 3-4 years because I store all my lessons, PPTs, documents, and resources on my classroom website (or in Google Docs which can be used in collaboration with my website). Besides that, simply by relying on a USB stick, you are risking spreading viruses between unprotected PCs or even absentmindedly leaving it behind after class.

Are you smarter than a College Freshman?

And another reason to start looking into setting up an LMS is because high-schoolers these days are learning this kind of technology themselves as graduation requirements.

In a document (created in 2006) I downloaded from the San Diego Unified School District that outlines High School Technology Compentencies, the following are the THREE level of Web Authoring competencies they seek for their students:

  1. Basic: Understand web authoring terminology, how to use templates, and district policies on copyright, ethics, privacy, and security
  2. Intermediate: Identify, prepare, create, and upload materials to a web publishing platform
  3. Advanced: Understand and be able to use CSS code, Flash video, downloads, forms, and databases

EdTech is transforming K-12 learning with an intensity and at a pace that is disruptive, creative, and unpredictable.

Students are no longer content to be passive recipients of information. Few kids can sit behind a desk when they have smart phones or iPads in their possession.

The higher education business model is threatened by the need for cheaper delivery of services, content, and learning.

Pricing, Access, Connectivity, Competition – It’s all about Economics.

“EdTech – Revolution in Education” from the Alliance for Science & Technology Research in America

Actually, what we’re talking about here is the FUTURE of education. Every other industry in the world has seen a radical technological reformation and evolution. Education is now also beginning a radical change in the way school and learning happens, but where will our place be in this period of transition and change?

I think the main reason that more people don’t get more involved with EdTech is FEAR. They are afraid of the unknown, afraid of learning (difficult) new things, or afraid of being left behind.

But, I want to alleviate your fears a bit and argue that WordPress is a (comparatively) easy solution for beginning to get more of your own classes online.

Step 1B: Why WordPress?

define:WordPress/
The #1 web publishing CMS (Content Management System) in the world – powering 23% of all the world’s websites.
FREE. unlimited. awesomeness.

But what about some of the other LMS’s you may already be familiar with?

  1. Moodle
  2. Edmodo
  3. Blackboard
  4. Desire2Learn (D2L)
  5. Canvas
  6. Schoology

I think there are at least 6 primary considerations to keep in mind when choosing a suitable LMS. Each of the above is excellent in some of these aspects, but only WordPress rocks all of them:

  1. Price
  2. Power
  3. Flexibility
  4. Simplicity
  5. Support
  6. Reliability

1: Price

WordPress is “forever FREE” due to the GNU GPL2 license.

2: Power

There are over:

  1. 3,000 FREE Themes
  2. 4,000 Premium Themes
  3. 35,000 FREE Plugins

available for WordPress. How much more power do you need?

3: Flexibility

Thanks to WordPress Multisite (a nifty optional feature in the WordPress core), the software is infinitely scalable. A couple of good examples of this are:

  1. WordPress.com that serves up over 500 million sites using only ONE code base
  2. Best Buy which uses ONE base installation to power their 1000s of store sites
  3. The New York Times, Forbes, and Reuters blogs which are all Multisite installations

4: Simplicity

WordPress is not “easy” as in “post-on-Facebook-easy” but compared to the many other options out there, it is surprisingly easy. I’ve even transferred clients to WordPress from Joomla and Moodle after spending significant time with them in the backend trying to fix things how they wanted.

The WordPress Post editor closely resembles a Microsoft Word document editor and is just as easy to publish with.

If you can Word, then you can WordPress.

In fact, in a 2014 survey of WordPress users around the world, the company found out that 91% of WordPress sites took less than 4-5 weeks to make. This is comparatively easy! And I have experience putting together basic sites with all the elements in only ONE week or less.

5: Support

WordPress already powers 1 in 5 sites you visit on the web, and it’s still growing.

  1. 2014 was the first year that non-English downloads surpassed English downloads
  2. There are 17 posts published EVERY SECOND on WordPress.com
  3. Many of the major corporate, political, and tech brands use WordPress
  4. The WordPress Community is enormous, friendly, and helpful. There are:
    1. WordPress Support forums
    2. WordPress Meetups to provide training and assistance (like our Jeonju Meetup)
    3. WordCamps for networking and education
    4. WordPress.tv that contains filmed WordCamp presentations

6. Reliability

WordPress.com gets roughly the same number of monthly unique visitors that Facebook.com gets so up-time and security are big deals. The WordPress.com development team pushes updated code to the core between 60-80 times PER DAY, so both of those facts should give you a feel for just how reliable this service and software are.

If you choose to go self-hosted, however, all that depends primarily on your web host. But the following is a list of some of the top hosts in the world:

  1. Dreamhost (*affiliate) – get 2 months FREE hosting with the code: WPMUJJ
  2. Bluehost
  3. Host Gator
  4. GoDaddy
  5. WPEngine

Step 2A: How does an LMS work and how can we use it?

define:Blended Learning/
Education that integrates online and in-person delivery with some element of student control over the time and place in which they access the course content.

Face-to-face interaction + Computer-mediated activities

Consider the following types of classrooms:

  1. Traditional
  2. Flipped (Blended) classrooom
  3. MOOC

What’s an MOOC?

define:MOOC/
Massive Online Open Courses: an online course aimed at unlimited participation and open access via the web.

Examples of MOOCs include:

  1. edX
  2. Khan Academy
  3. Udacity
  4. Udemy
  5. Coursera

I’m NOT an advocate for a strictly MOOC-style LMS. These systems conduct courses primarily online with minimal teacher-student interaction except via the forums. Granted, some teachers are very participatory in the forums, but not all are – and online forums still leave something to be desired compared to the traditional model of in-class, face-to-face, teacher-student and student-student interaction.

Besides that, MOOCs are COMPLICATED to implement, especially without a dedicated team behind them.

I feel that, at least as far as online course websites are concerned:

Simplicity is the Ultimate Sophistication.

Leonardo da Vinci

Therefore, when considering the following options for course website preparation, I’d recommend:

  1. Level of Instruction: prepare a SINGLE course (at least a first)
  2. Time (Schedule): allow a modified time schedule for students to access the site
  3. Role of Online Components: enhanced
  4. Teacher role: Teacher supports
  5. Student role: Teacher-guided learning
  6. Student support: School mentoring
  7. Student to Teacher ratio: 2-3x Traditional

But, for simplicity’s sake, here are the TWO MOST PRACTICAL ways you can implement an LMS website in your classroom:

  1. Go paperless
  2. Make homework include online interaction

Step 2B: How can we use WordPress to create an LMS?

There are TWO options for using WordPress to create an LMS:

  1. WordPress.com
  2. WordPress.org
WORDPRESS.COM
  1. Is a hosting SERVICE where you can get a FREE site and username at their domain (http://yourname.wordpress.com)
  2. Is limited in freedoms, but provides paid upgrades and is still a viable option for class websites
WORDPRESS.ORG
  1. Hosts the (downloadable) SOFTWARE and all documentation, but you are required to find your own self-hosting solution (http://www.yourname.com)
  2. Is virtually unlimited in customization options

If you go self-hosted, many of the top hosting providers offer a “One-Click Install” from the CPanel (Control Panel) of their site. It’s a simple matter of point-click-wait-5-minutes and you’ll have the FULL WordPress software up and running on your domain.

Here’s a list of recommended hosting providers again:

  1. Dreamhost (*affiliate) – get 2 months FREE hosting with the code: WPMUJJ
  2. Bluehost
  3. Host Gator
  4. GoDaddy
  5. WPEngine

Step 3: What are the specific steps we can take to create an LMS in WordPress?

Consider the 6 aspects of the learning process again:

  1. Communicate objects (syllabus, course objectives, handouts, etc)
  2. Learning timelines (class schedule)
  3. Delivery of materials (drip content)
  4. Assessment & Tracking of student data
  5. Communication with students
  6. Ongoing Resources

In WordPress, you will only need to understand (a minimum of) 5 key concepts to be able to effectively communicate the above 6 aspects to your students. They are:

5-key-concepts

  1. Pages
  2. Posts
  3. Categories
  4. Tags
  5. Media

1. Pages

pages

Pages are hierarchical, “stand alone” articles on your site. Though they have publication dates (and can be scheduled for automatic future publication), they do not “flow” as a blog would. Pages are not inherently “related” to each other and they ARE NOT categorized by Categories nor Tags (more later).

If you want a Page to have some kind of relation to another Page, you must assign it a “Parent” in the Page Attributes widget in the Page editor.

Pages will therefore act like individual menu items (they will be automatically added to your main menu if you don’t create one manually) – and “Parent” Pages will act as the top-level dropdown menu containing any “Child” Pages beneath them.

Pages may also utilize “templates”. These will give your Pages a different output on the front of the website and may look like any of the following:

  1. Home page
  2. Landing page
  3. Contact page
  4. Clients page
  5. About page
  6. Full-Width page
  7. And so on

2. Posts

posts

Posts are chronological (non-hierarchical) articles that “flow” along the Blog page, Home page, or Archive pages as they are written and published.

Posts are grouped together by Categories (that act like “buckets” or Folders), and Tags (keywords that are used to Search the site).

Posts may also utilize “Formats” that style certain Post types differently. For example, you may have different styles for:

  1. Regular (Standard) Posts
  2. Aside Posts (without a title visible on the Blog archive Page)
  3. Image Posts
  4. Video Posts
  5. Quotation Posts
  6. Link Posts
  7. Gallery Posts
  8. Status Update Posts
  9. Audio Posts
  10. Chat Posts

3. Categories

categories

On the front-end of a site, Categories may be visible as Folder names for Month or Topic, or in the Breadcrumbs (the “You Are Here” collection of links at the top of a Post), or as individual Menu items.

(On the front-end, you won’t really be able to SEE the difference between Categories and Pages as they appear in the menu unless you click on the link. If it’s a Category, there will be a long list of Posts; if it’s a Page, there will be only ONE Page.)

With Categories, I usually assign each of my Classes to a separate Category. That way, when the students click on the Category name, they are taken directly to an ongoing blog list of ONLY Posts for their class.

4. Tags

tags

On the front-end of a site, Tags may be visible in a “Tag Cloud” (a collection of frequently used keywords throughout the site), or in the footer meta (a collection of data at the bottom) of a Post. You can also Search for Tags as these are WordPress’s “keywords.”

With Tags, I usually add the keywords for the lesson subject – such as a grammar point we’re studying or the key concepts to understand.

5. Media

WordPress Media is unique in TWO primary ways:

  1. You can Drag-&-Drop media from your Desktop directly into the Post editor window to upload files.
    media-dragdrop
  2. You can Copy-Paste URLs from popular websites like YouTube and Twitter to get immediate, automatic embeds of those videos and tweets (among other things). No more copying over embed codes!
    media-embeds

The WordPress editor also provides you with a view of what your Post will ACTUALLY look like on the front-end even as you type it and before publishing it.

Step 3B: Plugins add Power

0-plugins

The above 5 functions are available both on WordPress.com and with the WordPress.org software. However, if you REALLY want to power-up your LMS, going self-hosted and installing your own plugins is the best way to go.

The following lists provide (at least) FOUR plugin options for EACH of the 6 aspects of learning previously discussed:

1. Communicate Objects

1-commobjs

  1. WPMU CoursePress
  2. WP Teacher
  3. Educator
  4. Easy Classes

2. Learning Timelines

2-timelines

  1. The Events Calendar
  2. Weekly Class Schedule
  3. My Calendar
  4. Booking Calendar

3. Delivery (Drip Content)

3-delivery

  1. WP-Members
  2. Simple Course Creator
  3. Table of Contents Plus
  4. Show/Hide Content at Set Time

4. Assess & Track

4-assessntrack

  1. AN_Gradebook
  2. Quiz Tool Lite
  3. Easy Quiz Player
  4. BadgeOS LearnDash Add-on

5. Communicate with Students

5-commwstds

  1. Disqus Comment System
  2. Akismet Spam Comment Blocker
  3. bbPress Forums
  4. BuddyPress Social Network

6. Ongoing Resources

6-resources

  1. Enhanced Media Library
  2. BackWPup
  3. Google Drive WP Media
  4. Google Drive Embedder

Full-fledged LMS systems for WordPress

  1. LearnDash
  2. Woo Sensei
  3. WP Courseware
  4. Lifter LMS
  5. Namaste! LMS (Free)

So, how will YOU use WordPress in your classroom? (or business)?

A Comprehensive Overview of WordPress Site Owner Roles

This post originated as “A Simple Roadmap to Get Up & Running with WordPress”, but it gradually morphed into something a tad more complex. So here is “A Comprehensive Overview of WordPress Site Owner Roles.”

While this post originated as “A Simple Roadmap to Get Up & Running with WordPress”, it gradually morphed into something a tad more complex, so we’ll call it “A Comprehensive Overview of WordPress Site Owner Roles.”

For starters, here’s a list of the different roles you can expect to have when you start and maintain a WordPress (or any other) website and the most basic tasks each will deal with (click any role to be taken directly to its description):

  1. TECHIE: performs the initial installation of the website
    1. Tasks
      1. Domain name registration
      2. Website hosting
      3. File transfers (FTP Clients)
  2. ADMIN: sets up and maintains the website backend
    1. Tasks
      1. Username + Password
      2. Site Setup
      3. Site Management
    2. Supplementary Topics (later)
      1. Site Security
      2. Site Backups
      3. Plugins
      4. Managing Users
      5. Advanced Admin Tasks
  3. DESIGNER: deals with the website frontend
    1. Tasks
      1. WordPress Customizer
      2. WordPress Menus
      3. WordPress Widgets
    2. Supplementary Topics (later)
      1. Theme Choice
      2. Custom CSS
      3. Custom HTML in Posts
      4. Basic Graphic Design
        1. Color Theory
        2. Typography
        3. Layout
      5. Site Branding
  4. CONTENT CREATOR: pushes NEW content to the website on a regular basis
    1. Understand:
      1. WordPress media
      2. The difference between Posts and Pages
      3. The difference between Tags and Categories
    2. Supplementary Topics (later)
      1. SEO
      2. Social Sharing
      3. Using Blog Templates
      4. Content Delivery
        1. Successful Content Types
        2. Making an Editorial Calendar
        3. Delivery methods: Email, SNS, RSS, CDNs
  5. DEVELOPER: modifies, maintains, or adds code
    1. Advanced Topics (later)
      1. HTML + CSS
      2. JavaScript + jQuery
      3. PHP + MySQL
      4. WordPress Codex
        1. Plugin Development
        2. Theme Development
        3. Contributing to the WordPress Core
      5. WordPress Development Best Practices

Each of the roles above has its own complexities and full blog posts (even books) have been written about each one. But, I will try to keep this simple and focus primarily on the main 3-5 tasks or objectives that you will need to perform in each role on a BASIC level.

(I will also provide a list of 5-6 additional tangential considerations for each role that may yet sprout off into supplementary blog posts for each.)


wpmu2-techie

1. Techie

Performs the initial installation of the website.

The 3 major tasks a “techie” must deal with are:

  1. Domain name registration
  2. Website hosting
  3. File transfers (FTP Clients)

When running WordPress, you have TWO options for how to host your site:

  1. WordPress.com = hosted on the WordPress.com service & most of the hosting issues are taken care of for you through the service
  2. WordPress.org = a software download that you install yourself (or through a third-party hosting company) on a domain of your choice (and purchase)

WordPress.com

Hosting your site on WordPress.com is pretty self-explanatory. You sign up for a FREE blog and create a username that becomes your blog’s initial URL (unless you upgrade) at yourname.wordpress.com. Simply head over to their new blog creation page and follow the steps to get started.

WordPress.org

Downloading the software from WordPress.org and installing it on your own site (for example, yourname.com) is slightly more complicated, but not by much. You have two simple options to get started:

  1. Purchase a domain name (URL), purchase hosting, and perform “the Famous 5-Minute Install” yourself
  2. Find a host that does all of this for you will a One-Click Install

(What is a One-Click Install? Simply: you choose the software you want to install, click “Install”, select the destination, and the webhost’s installer performs all the default installation steps for you. The next thing you’d do is visit your site and log in to your newly installed website system.)

A Spattering of Web hosting Providers

While whole blog posts have been written to guide users through the choice of a plethora of web hosting providers, I’ll simply provide a list with my own experience below:

  1. Dreamhost.com – affiliate (I’ve been a happy customer since 2009 – service keeps improving – hosting around $10/month)
  2. Bluehost.com (My second choice – hosting for as low as $3.95/month)
  3. Hostgator.com (Another highly recommended company, though I have no direct experience with them – honestly their branding and logo didn’t meet the same quality as the previous two, so I didn’t bother getting to know them better)
  4. GoDaddy.com (Most famous for Domain name registrations as far as I know though they do provide hosting as well)
  5. WPEngine.com (A proprietary WordPress hosting provider – you’ll pay a premium but also get premium service)

Domain Name Registration services I’ve used

  1. Dreamhost.com –*affiliate (I just like having domain name registry and hosting all together)
  2. Nameboy.com (This is a good place to go if you have TWO keywords that you want to blend together in different combinations – including hyphenated options)
  3. Namecheap.com (This site provides the greatest number of secondary TLD recommendations if your primary choice is not available)

TLD = Top-Level Domains

The original Top-Level Domains (introduced in the 1980s) were .com, .org, .net, .edu, .gov, .mil, and .int. Countries also have their own TLDs including .uk, .au, .kr, among others. And in the 2000s, particularly from 2012 and onward, 1000s more TLDs have been created so that when I go to register a new domain in Dreamhost (*affiliate), I can find a page that looks something like this:

Affiliate link: http://www.dreamhost.com/r.cgi?508174

Each TLD has its own unique price, though the majority are between $10-50 for a one-year registration. (But check out the price of .rich in the above image!)

Best Advice for Choosing a Domain Name

Keep it Simple, Silly.

5 Top Domain Naming Tips

  1. Simple, sweet, and easy to remember is best
  2. Your domain name should tell or stand for what you do and be recognizable
  3. Hyphens, dashes, and underscores are allowable but add complexity
  4. Extra long names are hard to remember
  5. If you want exclusivity (and so no one can piggy-back off your name with a different TLD), buy ALL the major TLDs with your name, i.e. nike.com, nike.net, nike.org, nike.info, etc.

Bad example:

http://www.thelongestdomainnameintheworldandthensomeandthensomemoreandmore.com/

Great example:

http://ma.tt/

Finally, dealing with Files

Lastly, a techie will deal with the uploading, downloading, transferring, and modification of blog files (installation files, images, videos, podcasts, etc). This will likely be an ongoing process, so you may as well get familiar with it now. The following is a list of FTP (File-Transfer Protocol) clients that I’ve used and recommend:

  1. FileZilla (my #1 recommendation because it is cross-platform and well-designed)
  2. FireFTP (an add-on for Mozilla’s Firefox browser)
  3. CyberDuck (an FTP client I’ve used extensively on MacOSX – now also available for Windows)


wpmu2-admin

2. Admin

Sets and manages up the backend of the website.

The 3 major tasks an “admin” must deal with are:

  1. Username + Password
  2. Site setup
  3. Site management

To start off with, good username and password choice goes a LONG way to ensuring the safety of your blog.

2 Top Tips (Username + Password):

  1. Username: NEVER EVER EVER EVER pick “admin” as your username. This is the old default WordPress admin name, so everybody (hackers) and their dogs (hacker dogs) know it. This will be the FIRST thing someone tries if they want to hack your site.(Too late? Create a new “admin” account with a new username, then transfer all the posts and content over to the new username and delete your old “admin” account. Or find out how to change the “admin” account in the database tables – phpMyAdmin – here.)
  2. Password: “K33P C4LM AND 5P34K L337”
    (i.e. “Keep Calm and Speak Leet” – Leet (L337) is kind of a techie way to write using numbers and symbols in place of letters that look similar)

5 Top Password Creation Tips:

  1. Use a combination of UPPERCASE, lowercase, numb345, &$ymb@!$
  2. Create a pattern that’s easily recognizable or memorable for you (like this guy did)
  3. Use a site-specific “pass phrase rather than password (like “aaron@mydigitalH0M3”)
  4. Longer is always better – shoot for 10+ characters
  5. Avoid dictionary / common words / expressions / strings of numbers

Bad Examples (the most popular passwords of 2014):

123456, password, qwerty, baseball, dragon, football, monkey, letmein, abc123, 111111, mustang, access, shadow, master, michael, superman, 696969, 123123, batman, trustno1

Great Examples (how a password changed this guy’s life):

Quit@smoking4ever
Save4trip@thailand

First Steps

Once the username and password are setup and you’ve logged in to your WordPress site, here is a list of the TOP FIVE first things that I personally see to:

  1. Install Jetpack (this plugin will significantly upgrade your website by adding 34 powerful functions utilizing the WordPress.com cloud – WordPress.com username necessary – you can sign up for just the username here)
  2. Install Akismet (the #1 comment spam blocker plugin in the world – FREE for personal use or $5/month for a business)
  3. Make Pretty Permalinks (don’t allow your site to use “ugly” default URLs)
    1. Default: http://www.yoursite.com/?p=123
    2. Pretty: http://www.yoursite.com/your-post-name/
    3. *Note* It seems Pretty Permalinks are set to be the default in WordPress 4.2
  4. DESIGNER: Pretty up the Homepage (see below)
  5. CONTENT CREATOR: Write your first Post(s) (see below)

Detours (Later Topics)

The following are a list of additional topics that an Admin may need to deal with and be familiar with. Each one is worth its own (extensive) Post (or book), so I will revisit them later:

  1. Website Security
  2. Website Backups
  3. Plugins
  4. Site Management
    1. User Management
    2. Discussion Management
    3. Media Management
  5. Advanced Topics
    1. Updates & Site Tools


wpmu2-designer

3. Designer

Takes care of the frontend of the website.

3 primary tasks a “designer” should address are:

  1. The WordPress Theme Customizer (front page style editing)
  2. Menu Creation
  3. Widget Assignment

First Steps (in the “Appearance” Menu)

  1.  Customize – In the WordPress Customizer you can modify a variety of frontend design elements including:
    1. Site Title
    2. Tagline
    3. Colors
    4. Header Image
    5. Background Image
    6. Menus (Navigation)
    7. Widgets
    8. Static Front Page (this means you set your front page to a specific Page and your blog archive to a different Page)
  2. Menus – Tip: to make dropdown menus, simply click-and-drag one menu item (in your “Menu Structure” window) underneath and to the right of a preceding (its “parent”) menu item
  3. Widgets – Tip: if you’ve enabled some widgets and want to save their Settings for later, there’s a location at the bottom of the “Available Widgets” area (called “Inactive Widgets”) that you can click-and-drag those widgets you want saved into

Detours (Later Topics)

The following are a list of additional Design topics that may be of interest and will be revisited in later Posts:

  1. Theme Choice
  2. Custom CSS
  3. Custom HTML in Posts
  4. Basic Graphic Design
    1. Color Theory
    2. Typography
    3. Layout
  5. Branding


wpmu2-content

4. Content Creator

Is responsible for pushing NEW content to the website on a regular basis.

The 3 most important things a “content creator” must understand are:

  1. WordPress Media
  2. The Difference between Posts and Pages
  3. The Difference between Tags and Categories

It’s long been a mantra of the web: CONTENT IS KING and today is no exception. If you aren’t regularly pushing NEW and useful content to the forefront of the supersaturated Inter-webs, you’re missing a valuable opportunity and a good percentage of the consumer population. People are always on the look out for the “newest” or “hottest” so as a Content Creator, you’d really do yourself (and your audience) a good service if you regularly deliver that which they seek.

My own personal process for Content Creation looks like this:

  1. Plan (5-30 min)
  2. Research (30 min-1 hr)
  3. Write (1-2 hrs)
  4. Edit (10-30 min)
  5. Publish (1 min)

So, my own process for blogging may take anywhere between 1-4 hours. I tend to put a lot of emphasis on getting facts right, delivering useful information, and back-linking to the things I find, so that can end up taking up a good chunk of my time.

But if you’re interested in some more tips for How to Write a Blog Post in 70 Minutes or Less, check out Michael Hyatt’s podcast and post on the subject.

Understand:

WordPress Media

  1. Embeds : WordPress is capable of automatically embedding certain kinds of media from various webpages including videos, PDFs, presentations, and tweets – all you need to do is copy-paste the URL of a given page into your Post editor and WordPress handles the rest. A (non-comprehensive) list of sites is below:
    1. YouTube
    2. Vimeo
    3. SlideShare
    4. Twitter
  2. Uploads : Uploading your own media to WordPress is as simple as clicking and dragging the item from your Desktop directly into the Post editor. The Media Uploader automatically pops up and gives you more options. You are able to change the file upload size in your WordPress settings, but by default the max upload size is 10MB or so.
  3. Featured Images : A Featured Image (formerly known as “Post thumbnails”) is similar to a cover image for an article. Different themes handle these differently, but this is THE image that will primarily be associated with your Post (if you assign one) on your site and through Social Media when the Post gets shared. To add a Featured Image, scroll to the bottom of the sidebar in the Post editor page to find an Image Upload meta-box called “Featured Image.”

The Difference between Posts and Pages

  1. Posts : non-hierarchical articles that are referenced chronologically and can be categorized by Tags and Categories
  2. Pages : hierarchical articles that can be assigned “Parents” (those Pages that would form the head of a dropdown menu) and can NOT be categorized by Tags and Categories

The Difference between Tags and Categories

  1. Tags : non-hierarchical keywords used for Searching (like “green”, “big”, “important”, etc)
  2. Categories : create a kind of folder structure that can be used to subdivide articles (like “WordPress”, “Classes”, etc) – these ARE hierarchical

Detours (Later Topics)

The following are a list of additional topics that Content Creators may find of interest and will be revisited in later Posts:

  1. SEO (Search Engine Optimization)
  2. Social Sharing
  3. Using Blog Templates to speed up Content Creation
  4. Content Delivery Methods
    1. Content Types
    2. Creating an Editorial Calendar
    3. Email, SNS (Social Networking Services), RSS (Really Simple Syndication), CDNs (Content Delivery Networks)
  5. Serving Your Audience


wpmu2-developer

5. Developer

Maintains, modifies, or adds code.

The 3 main things a “developer” is likely to deal with are:

  1. Custom CSS code
  2. Custom HTML code within Posts & Pages
  3. Child Themes

As getting into the details of a Developer’s work is far more complex than this Post warrants, here’s a list of further topics to be discussed later in subsequent Posts:

Detours (Later Topics)

  1. Learn:
    1. HTML
    2. CSS
    3. JavaScript
    4. jQuery
    5. PHP
    6. MySQL
  2. Understand:
    1. WordPress Codex
    2. Plugin Development principles
    3. Theme Development principles
    4. How to make contributions to the WordPress core
    5. WordPress development best practices

Join the Discussion

I hope you enjoyed (and got a lot out of) this overview of the various roles a WordPress site owner needs to understand. If there are any questions, comments, or suggestions to improve this Post or for later topics to be covered, please leave me a Comment in the section below. Thanks!~