
Tag: teachers
-
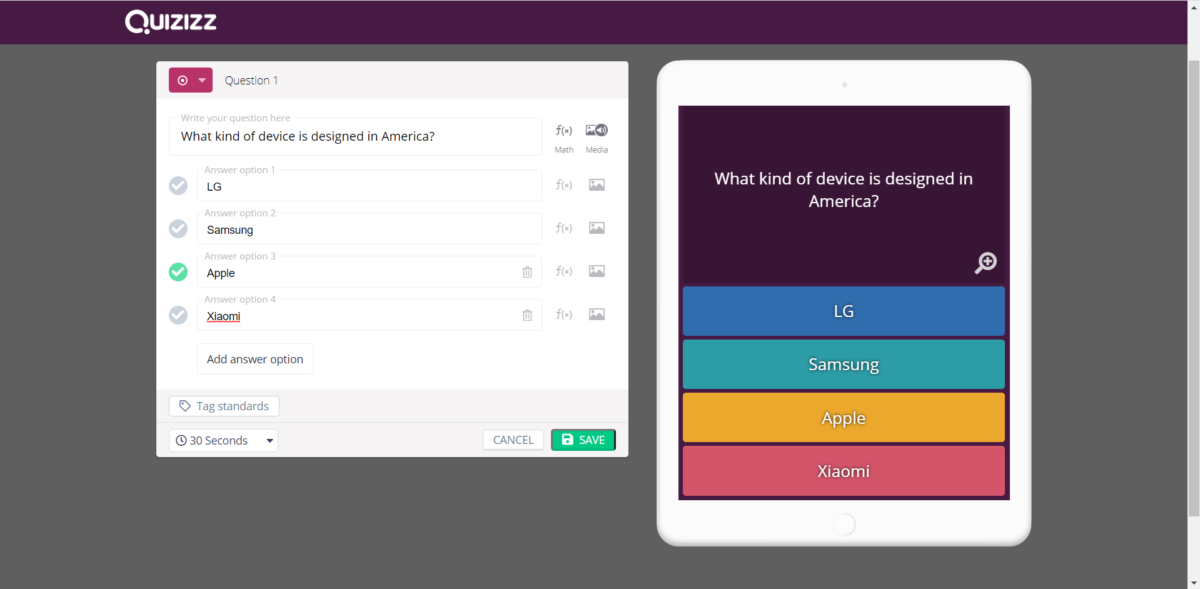
Using Quizizz in the Classroom
Quizizz is an app and website that is quite similar to Kahoot with a few interesting additions. Like Kahoot, a user can create a series of questions to ask a group of people who compete to answer them correctly and speedily. Scores are determined according to whoever answers correctly first. Quizizz, unlike Kahoot, adds some…
-
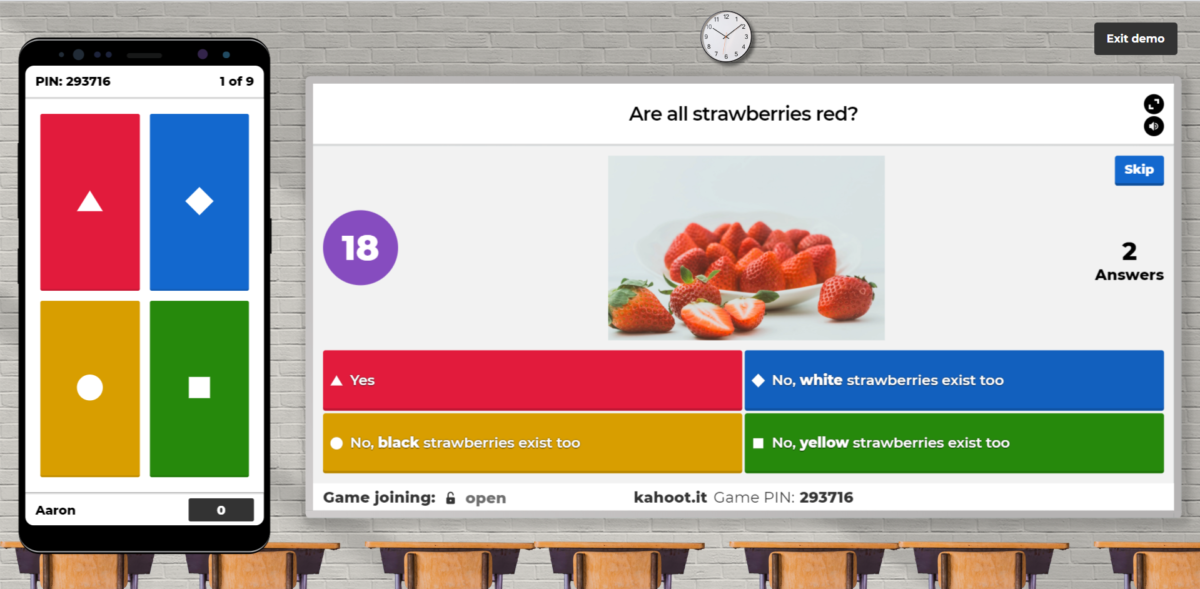
Using Kahoot in the Classroom
Kahoot is an interesting app and website that allows one user to create a series of questions to ask a group of people who compete to answer them correctly and speedily. Scores are determined according to whoever answers correctly first (points are allocated in decreasing amounts to second place, third place, and so on). Uses…